
Editing yourself into a picture is part technical skill, part creative judgment. Whether you want to appear in a group photo, make a travel-style composite, create social content, or experiment with creative photo edits, the best results come from matching light, scale, perspective, and texture—not just cutting and pasting. This guide walks you through a practical, beginner-friendly process for making your edit look intentional, polished, and believable.
Quick answer: For a new AI scene, upload an authorized photo, describe one change, generate, and compare the result with the original. To put yourself into an exact existing photograph, use a layer-based editor for precise placement. AI reference editing can reinterpret both the person and surroundings.
Open Photo Editor in Studio →How to edit yourself in a picture with AI
Start with AI Photo Editor when you already have a photo. For a recurring virtual creator, create or reuse a character, then use the consistent character photo workflow. A saved reference helps maintain identity; it does not guarantee an identical face or body in every output.
- Choose an authorized source. Use a clear adult portrait of yourself, or a character image you have permission to use. Keep an untouched copy for comparison.
- Open the photo workflow and add the image. Describe the desired background, lighting, framing, and one primary change. This is a source-led generation workflow, not a canvas with editable layers.
- Write what should stay the same. Specify facial identity, hairstyle, skin tone, and clothing when those details matter. For a wardrobe-focused change, use the clothes changer; generated clothing is not a fit test.
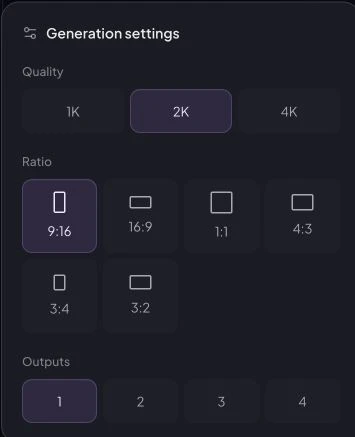
- Choose the available output options. Select an aspect ratio for your intended post and review the current credit quote before submitting. Start with one version; retries and additional versions can cost credits.
- Review, then vary one thing. Compare face shape, eyes, hands, clothing, perspective, and shadows against the source. Keep approved drafts in your workflow and review History. Generate a new scene or pose separately; finish exact text, layout, or pixel-level corrections in an external editor.
For repeatable social content, keep one approved source and the same identity description, then change the scene brief. Our prompt guide explains that structure, and these copy-and-paste photo prompts offer more scene ideas.
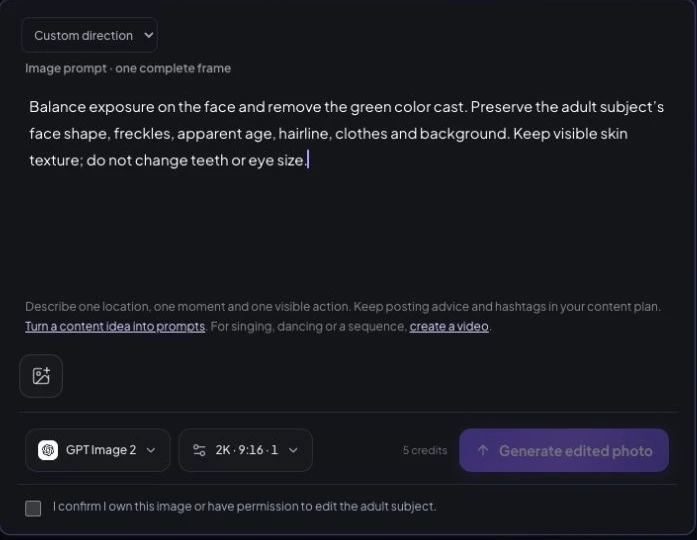
Fill the current Edit Photo form
Click Source image to choose the authorized photo, select Custom direction and describe one change in Direction. Example: “Balance exposure on the face and remove the green color cast. Preserve face shape, freckles, apparent age, hairline, clothes and background. Keep visible skin texture.” Select GPT Image 2, 2K, 9:16 and one output; the demo quotes five credits. Confirm ownership only when true, then check the quote before Generate edited photo. Compare the result with the original in History. No generation was submitted for these screenshots; a verified Studio before-and-after case is still missing.
Before and after: a garden portrait becomes an imagined trip
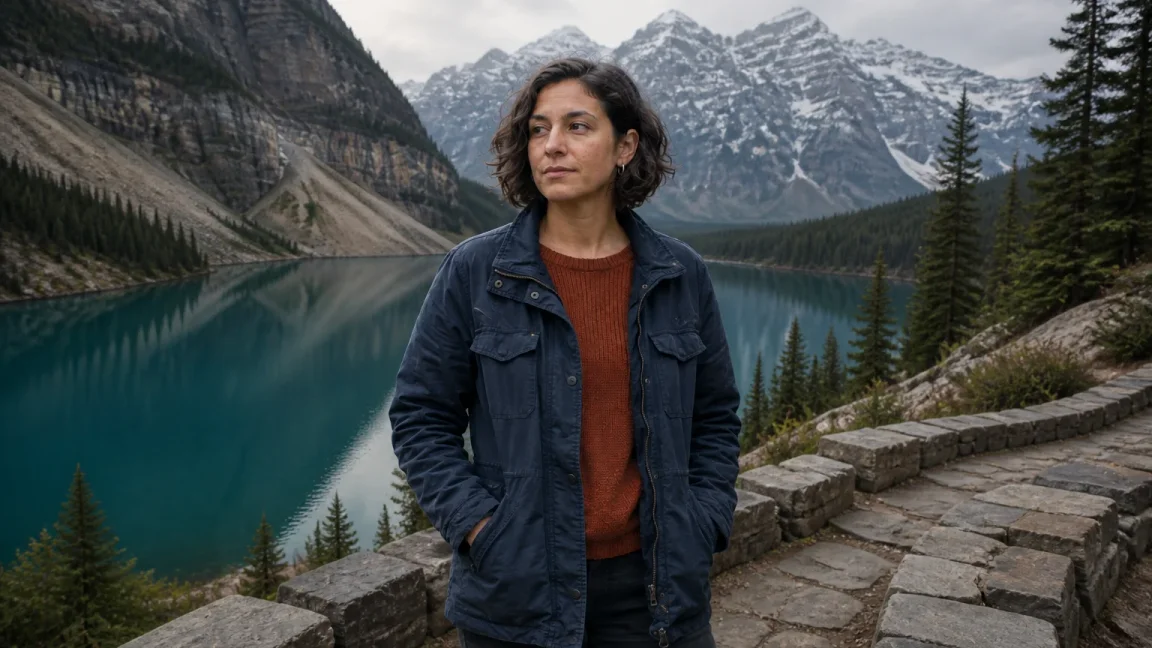
Before: a fictional adult creator on a neighborhood garden path. After: the same source edited into a mountain-lake concept, keeping the jacket and overall portrait framing. The useful comparison is identity and light, not simply a more dramatic background.
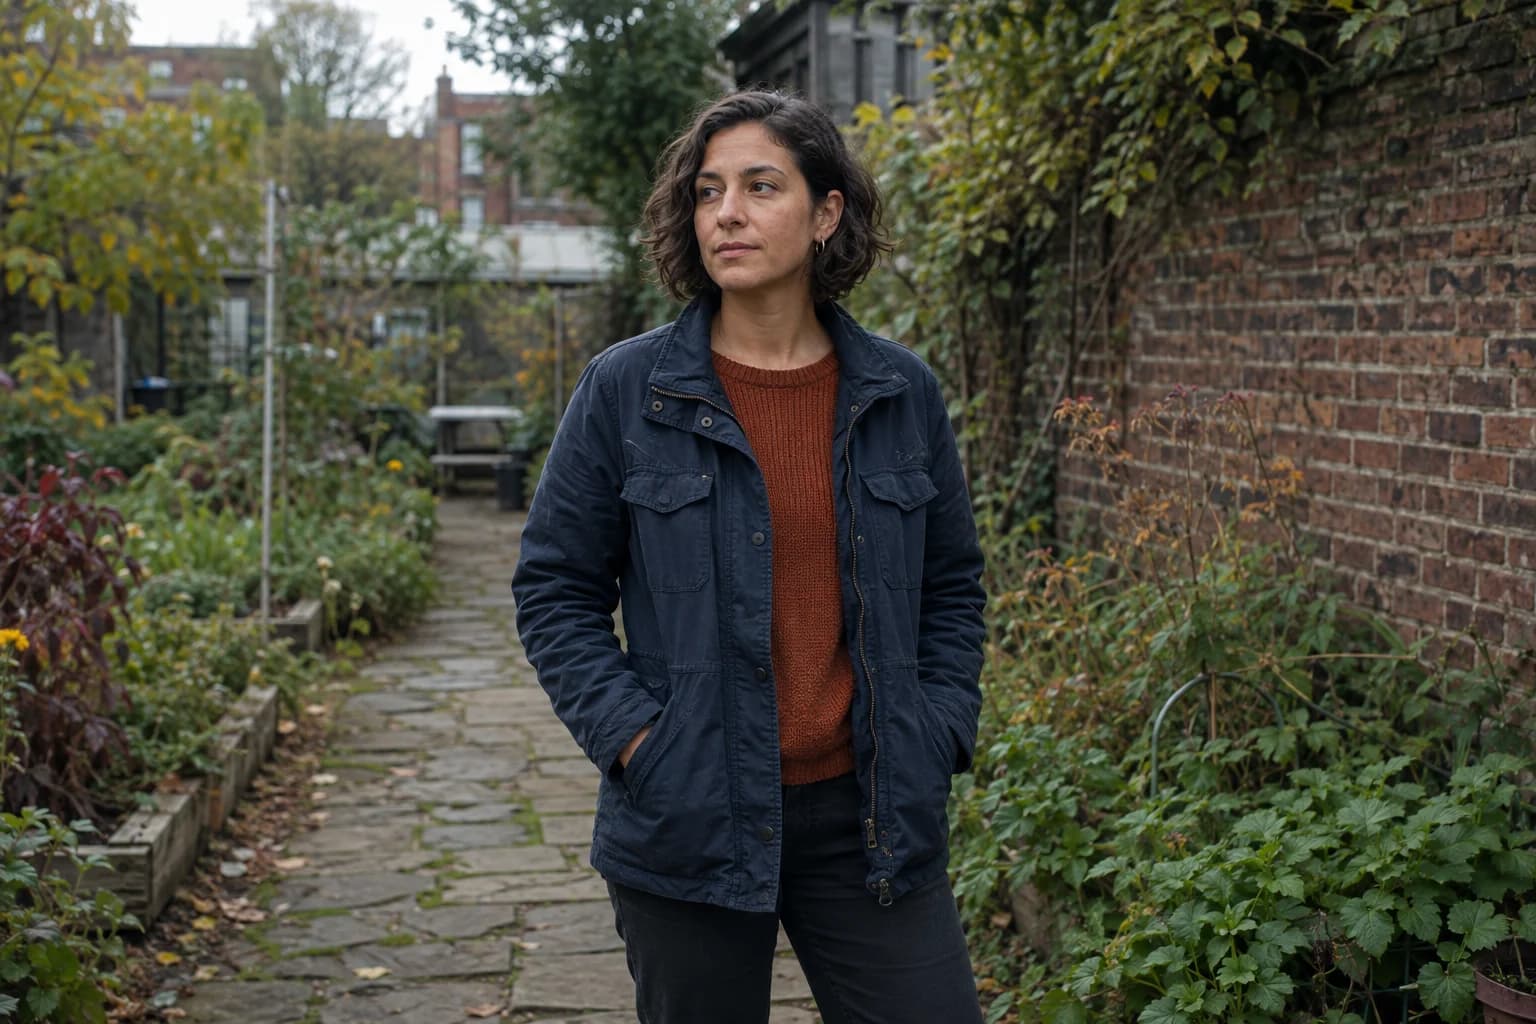
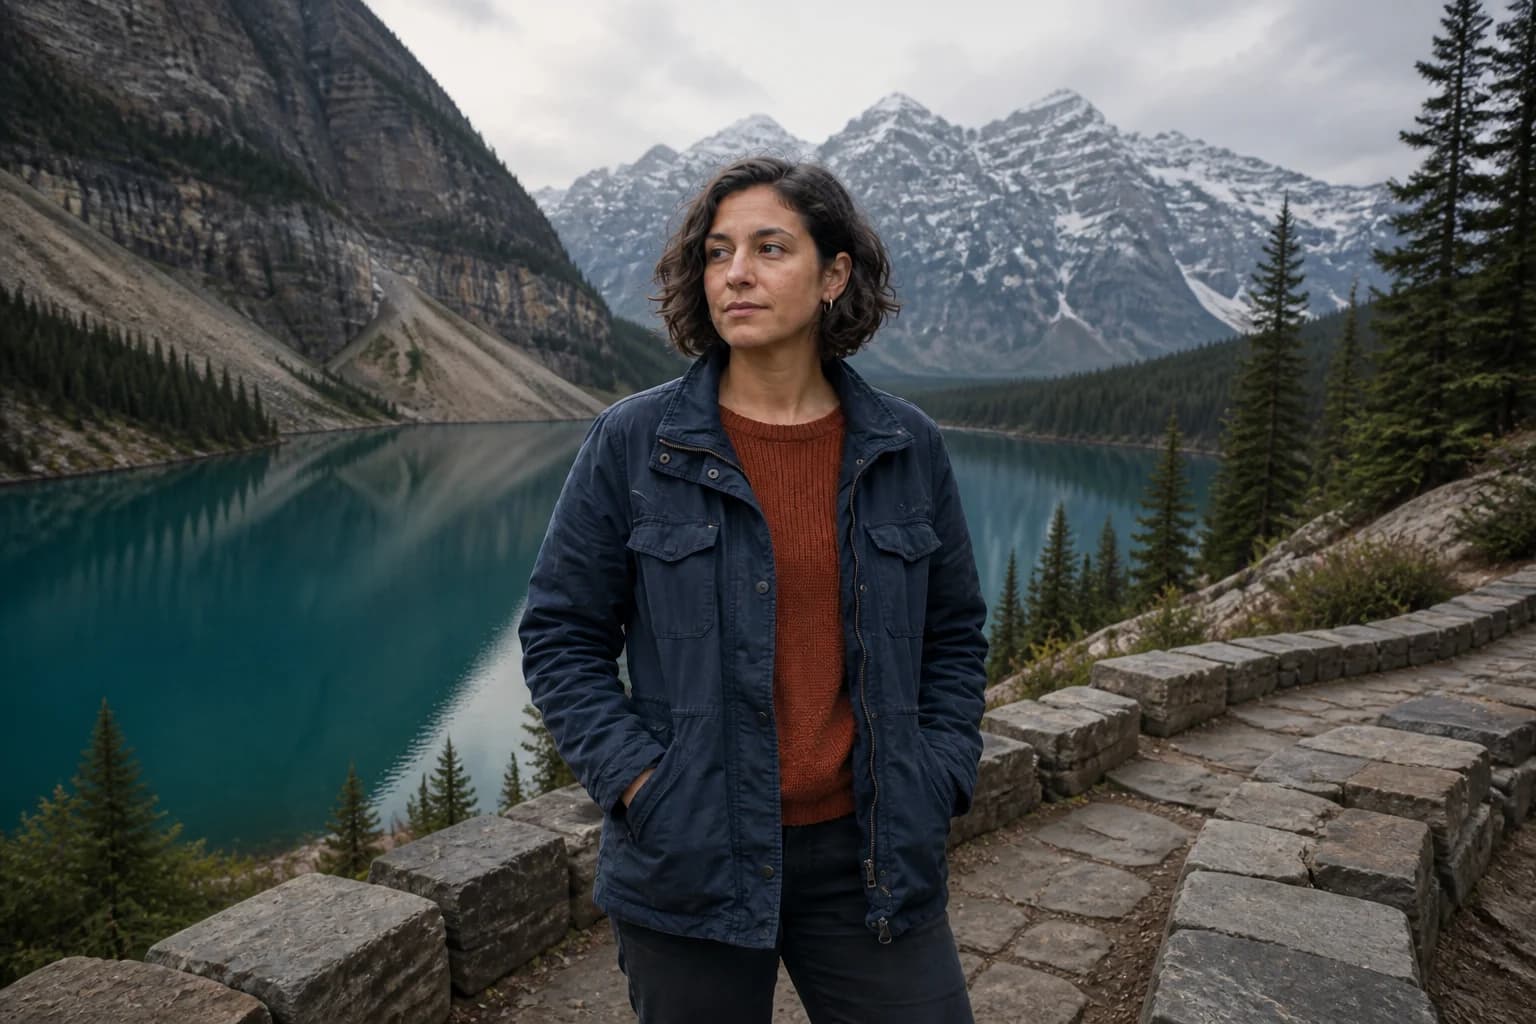
Keep the adult subject recognizable, including the dark bob, silver hoops, navy jacket, and rust top. Change the garden to a mountain-lake overlook with soft cloudy daylight from the upper left. Keep a natural three-quarter portrait and believable scale. Preserve skin texture; do not add text.
Use this as a starting brief, not a guarantee of the illustrated result. For a lighting-only version, ask to balance exposure and neutralize the color cast while keeping the background and identity. For a new pose, return to the approved source and describe one natural action; inspect anatomy afterward.
Open Photo Editor in Studio →How to edit a picture and put yourself in it with layers
The following manual method is useful when you need a specific existing background or precise placement. Use a separate editor with layers and masks; these are not manual controls in AI Influencer Generator.
For a manual composite, you need a clear photo of yourself, a background image, and an editing tool that lets you remove backgrounds, layer images, resize subjects, and adjust color. The basic process is simple: cut yourself out, place yourself into the new image, match the lighting and size, blend the edges, then export the finished picture. The more attention you give to small details like shadows and color temperature, the more natural the final image will feel.
You can do this with professional software, mobile editing apps, or browser-based tools. The tool matters less than the workflow. Even a simple app can create a strong result if your source photo and background are compatible.
Choose compatible source photos
The easiest way to make a convincing edit is to choose images that already share similar conditions. If your selfie was taken indoors under warm light, placing it into a bright snowy landscape may require heavy correction. If your photo was taken outdoors on an overcast day, it will blend more naturally into a soft, cloudy background.
Before you begin, compare the two images for:
- Lighting direction: Notice where the light hits your face and body. The background should suggest light from a similar angle.
- Camera height: A photo taken from below will look strange in a background shot from above.
- Sharpness: A crisp subject on a blurry background, or the reverse, can make the edit look fake.
- Color temperature: Warm golden light and cool blue light can clash unless corrected.
- Pose and angle: Your body position should make sense in the space you are entering.
If you are learning how to edit yourself in a picture for the first time, start with an easy match: an outdoor portrait and an outdoor background with similar lighting. Once you understand the basics, you can push the edit into more dramatic or surreal directions.
Remove the background and refine the edges
The cutout is the foundation of the whole edit. If the edges around your hair, hands, or clothing look rough, the final image will feel unfinished no matter how good the background is.
Many editing tools offer automatic background removal, which is useful for a quick start. After using it, zoom in and refine the selection manually. Pay close attention to areas where the background peeks through, especially around loose hair, glasses, fingers, and fabric folds.
A clean cutout does not mean a harsh cutout. Real photos have slightly soft edges, so avoid making your outline too sharp. If your tool has feathering, smoothing, or edge refinement options, use them lightly. The goal is to keep detail while removing the obvious signs of separation.
Place yourself at a believable scale
Once you add yourself to the new picture, resist the urge to immediately focus on filters. First, make sure your size and position make sense. People often make themselves too large in the scene, especially when editing themselves into landscapes, city streets, or interiors.
Use objects in the background as clues. Doorways, chairs, trees, railings, cars, and other people can help you estimate realistic scale. If the background has a visible floor, sidewalk, beach, or ground plane, your feet should connect naturally to that surface.
Perspective matters too. If the background camera is low and angled upward, your photo should not look like it was taken from eye level straight on. Small mismatches can be acceptable in stylized creative photo edits, but for realistic composites, perspective is one of the biggest giveaways.
Match light, color, and texture
You make the edit look natural by matching light, color, contrast, blur, grain, and shadows between yourself and the background. A pasted subject usually looks fake because it is too bright, too sharp, too colorful, or missing contact shadows. Blending is the step where separate images begin to feel like one photograph.
Work through these adjustments in order:
- Match brightness and contrast If your face is brighter than everything around it, lower the exposure or highlights. If you look flat compared with the scene, add gentle contrast.
- Adjust color temperature Warm up or cool down your cutout so the skin, clothing, and background feel like they belong in the same light.
- Add a shadow Even a soft shadow beneath your feet or body can anchor you in the image. Match the shadow direction to the light source.
- Soften or sharpen carefully If the background is slightly soft, reduce your sharpness a little. If everything is crisp, avoid over-blurring your subject.
- Add matching grain or texture Many photos have subtle noise, especially phone pictures. Adding a little consistent grain can help unify the edit.
This is also where restraint matters. Heavy filters can hide flaws, but they can also make the image look overprocessed. Aim for balance unless your goal is an intentionally bold, artistic result.
Add contact shadows
Shadows are one of the fastest ways to improve a composite. Without them, your body may appear to float above the scene. A realistic shadow gives weight and shows that your subject occupies physical space.
Start with a simple soft shadow under the feet if your full body is visible. If you are sitting, add shadow where your body meets the chair, bench, wall, or ground. Keep the shadow subtle; it should support the image, not draw attention.
Think about the light source. If the sun or lamp is on the left, the shadow should fall away from it. If the scene is cloudy or softly lit, the shadow should be diffused rather than dark and sharp.
Creative photo edits to try
After you understand how to edit a picture and put yourself in it realistically, you can start breaking the rules on purpose. Creative editing does not have to look realistic to be effective. It just needs to look deliberate.
Try ideas such as:
- Placing yourself in a fantasy landscape or futuristic city
- Creating a miniature version of yourself in an oversized room
- Duplicating yourself in different poses within one frame
- Blending your portrait with clouds, water, neon, or flowers
- Making a travel-style image from places you have not physically visited
- Turning a simple selfie into a poster-like social media graphic
For creative photo edits, consistency still matters. A surreal image can use impossible scale or color, but the composition should feel designed. Repeat colors, balance empty space, and make sure the viewer knows where to look first.
Check the details before exporting
A few small problems can quickly reveal an edit. Fortunately, most are easy to fix once you know what to look for.
Before exporting, check for:
- Hard cutout edges around hair, clothes, or hands
- Mismatched lighting between your face and the background
- No contact shadow beneath your body or feet
- Wrong scale compared with nearby objects
- Different image quality between subject and background
- Overdone blur that makes the edit look smeared
- Skin tones that look too orange, gray, or saturated
- Awkward placement that blocks important background details
A helpful trick is to step away from the image for a few minutes, then look again. You can also flip the canvas horizontally. This often makes scale, alignment, and balance problems easier to notice.
A nine-step manual compositing checklist
If you want a repeatable process, use this checklist from start to finish:
- Choose a clear photo of yourself with lighting that fits the background.
- Remove the original background and refine the edges.
- Place yourself into the new image as a separate layer.
- Resize and position your body using background objects as scale guides.
- Match brightness, contrast, color, and sharpness.
- Add realistic shadows where your body meets the scene.
- Apply final color grading to the whole image so it feels unified.
- Zoom in to inspect edges, then zoom out to judge the overall composition.
- Export in the right size for your use, whether social media, print, or personal storage.
Following the same order each time keeps the process manageable. It also helps you avoid wasting time on filters before the structure of the image is working.
Make your next edit intentional
Learning how to edit yourself in a picture is less about one magic tool and more about noticing what makes photos feel real. Clean edges, believable scale, matched lighting, and grounded shadows do most of the heavy lifting. Once those basics are in place, you can keep the edit realistic or use the same skills to create something playful, dramatic, and completely imaginative.
Label imagined travel and creative composites clearly. Do not present a generated scene as evidence of visiting a place, meeting someone, using a product, or receiving an endorsement. See our AI disclosure guidance.
For manual finishing, Adobe documents how Photoshop layers work. For subtler portrait corrections, read how AI photo editors improve selfies.
Open Photo Editor in Studio →
Plan Content
Measure Engagement
Build Your Profile
Price Your Work
Write Post Copy
Brand Partnerships