
AI Skin Texture Enhancer
Less plastic. More character. Add subtle skin texture to an overly smooth portrait, then compare the result with your original.
Enhance skin textureYour image. One focused edit. Review before downloading.
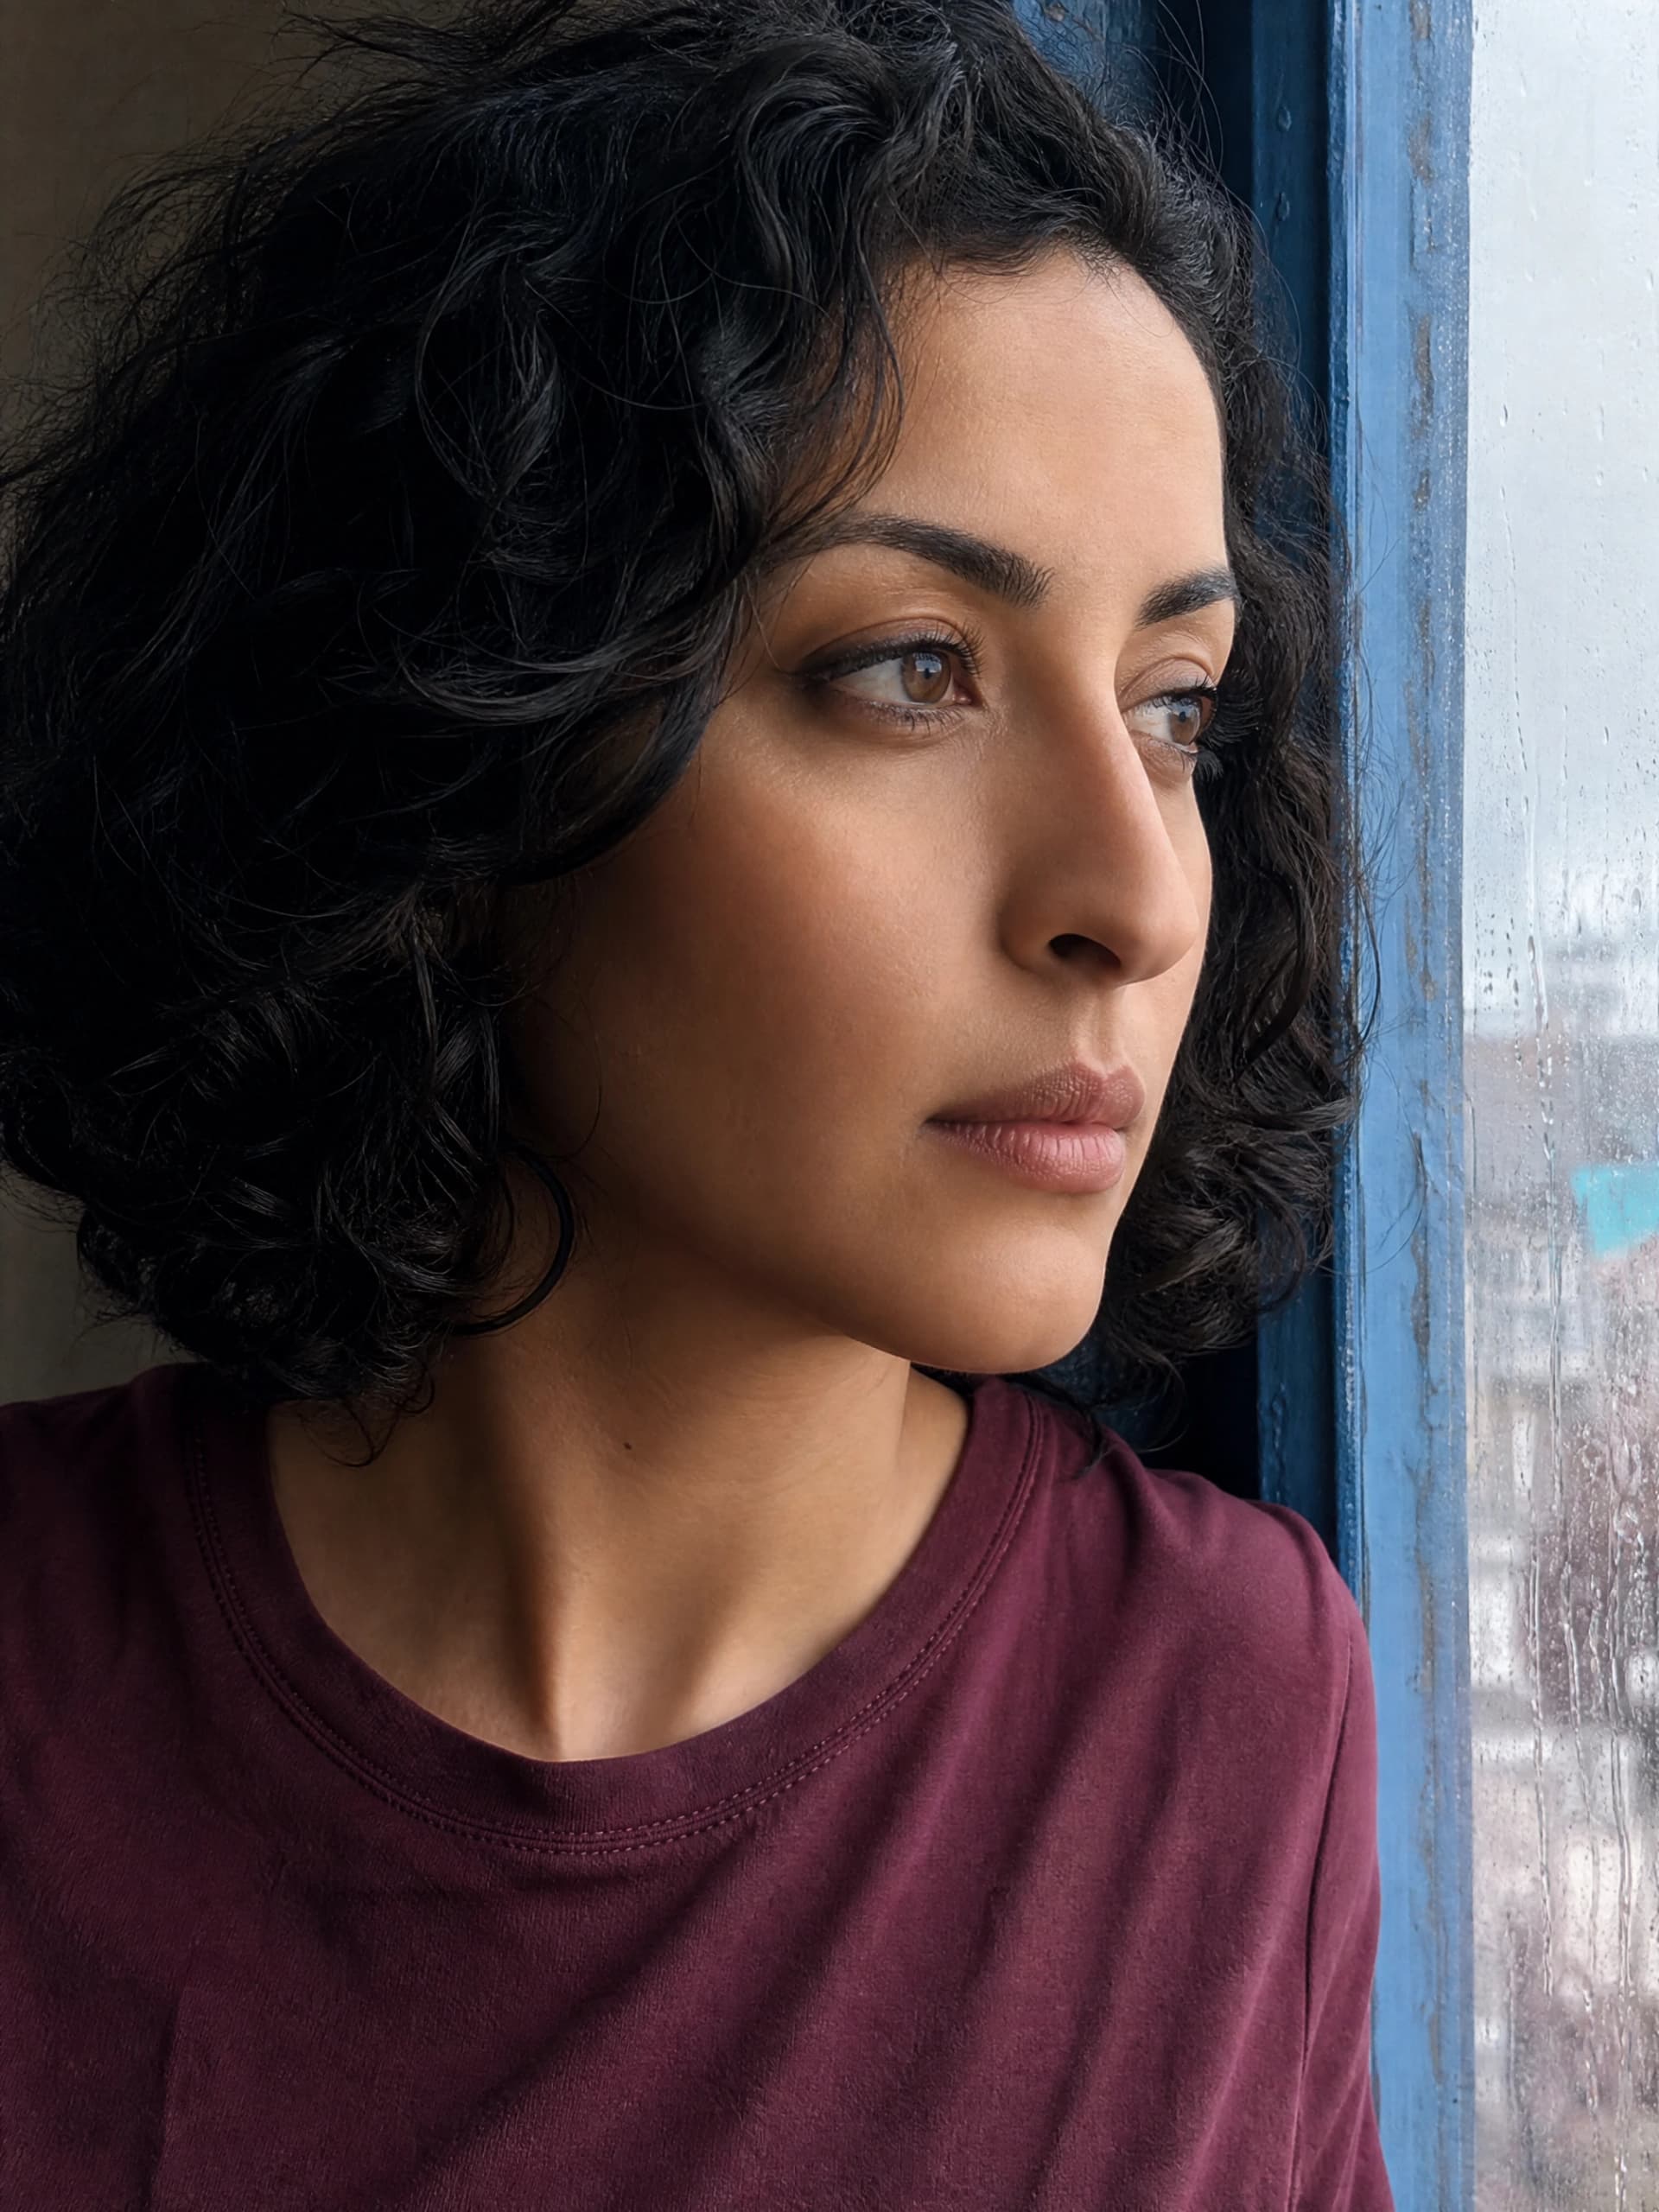
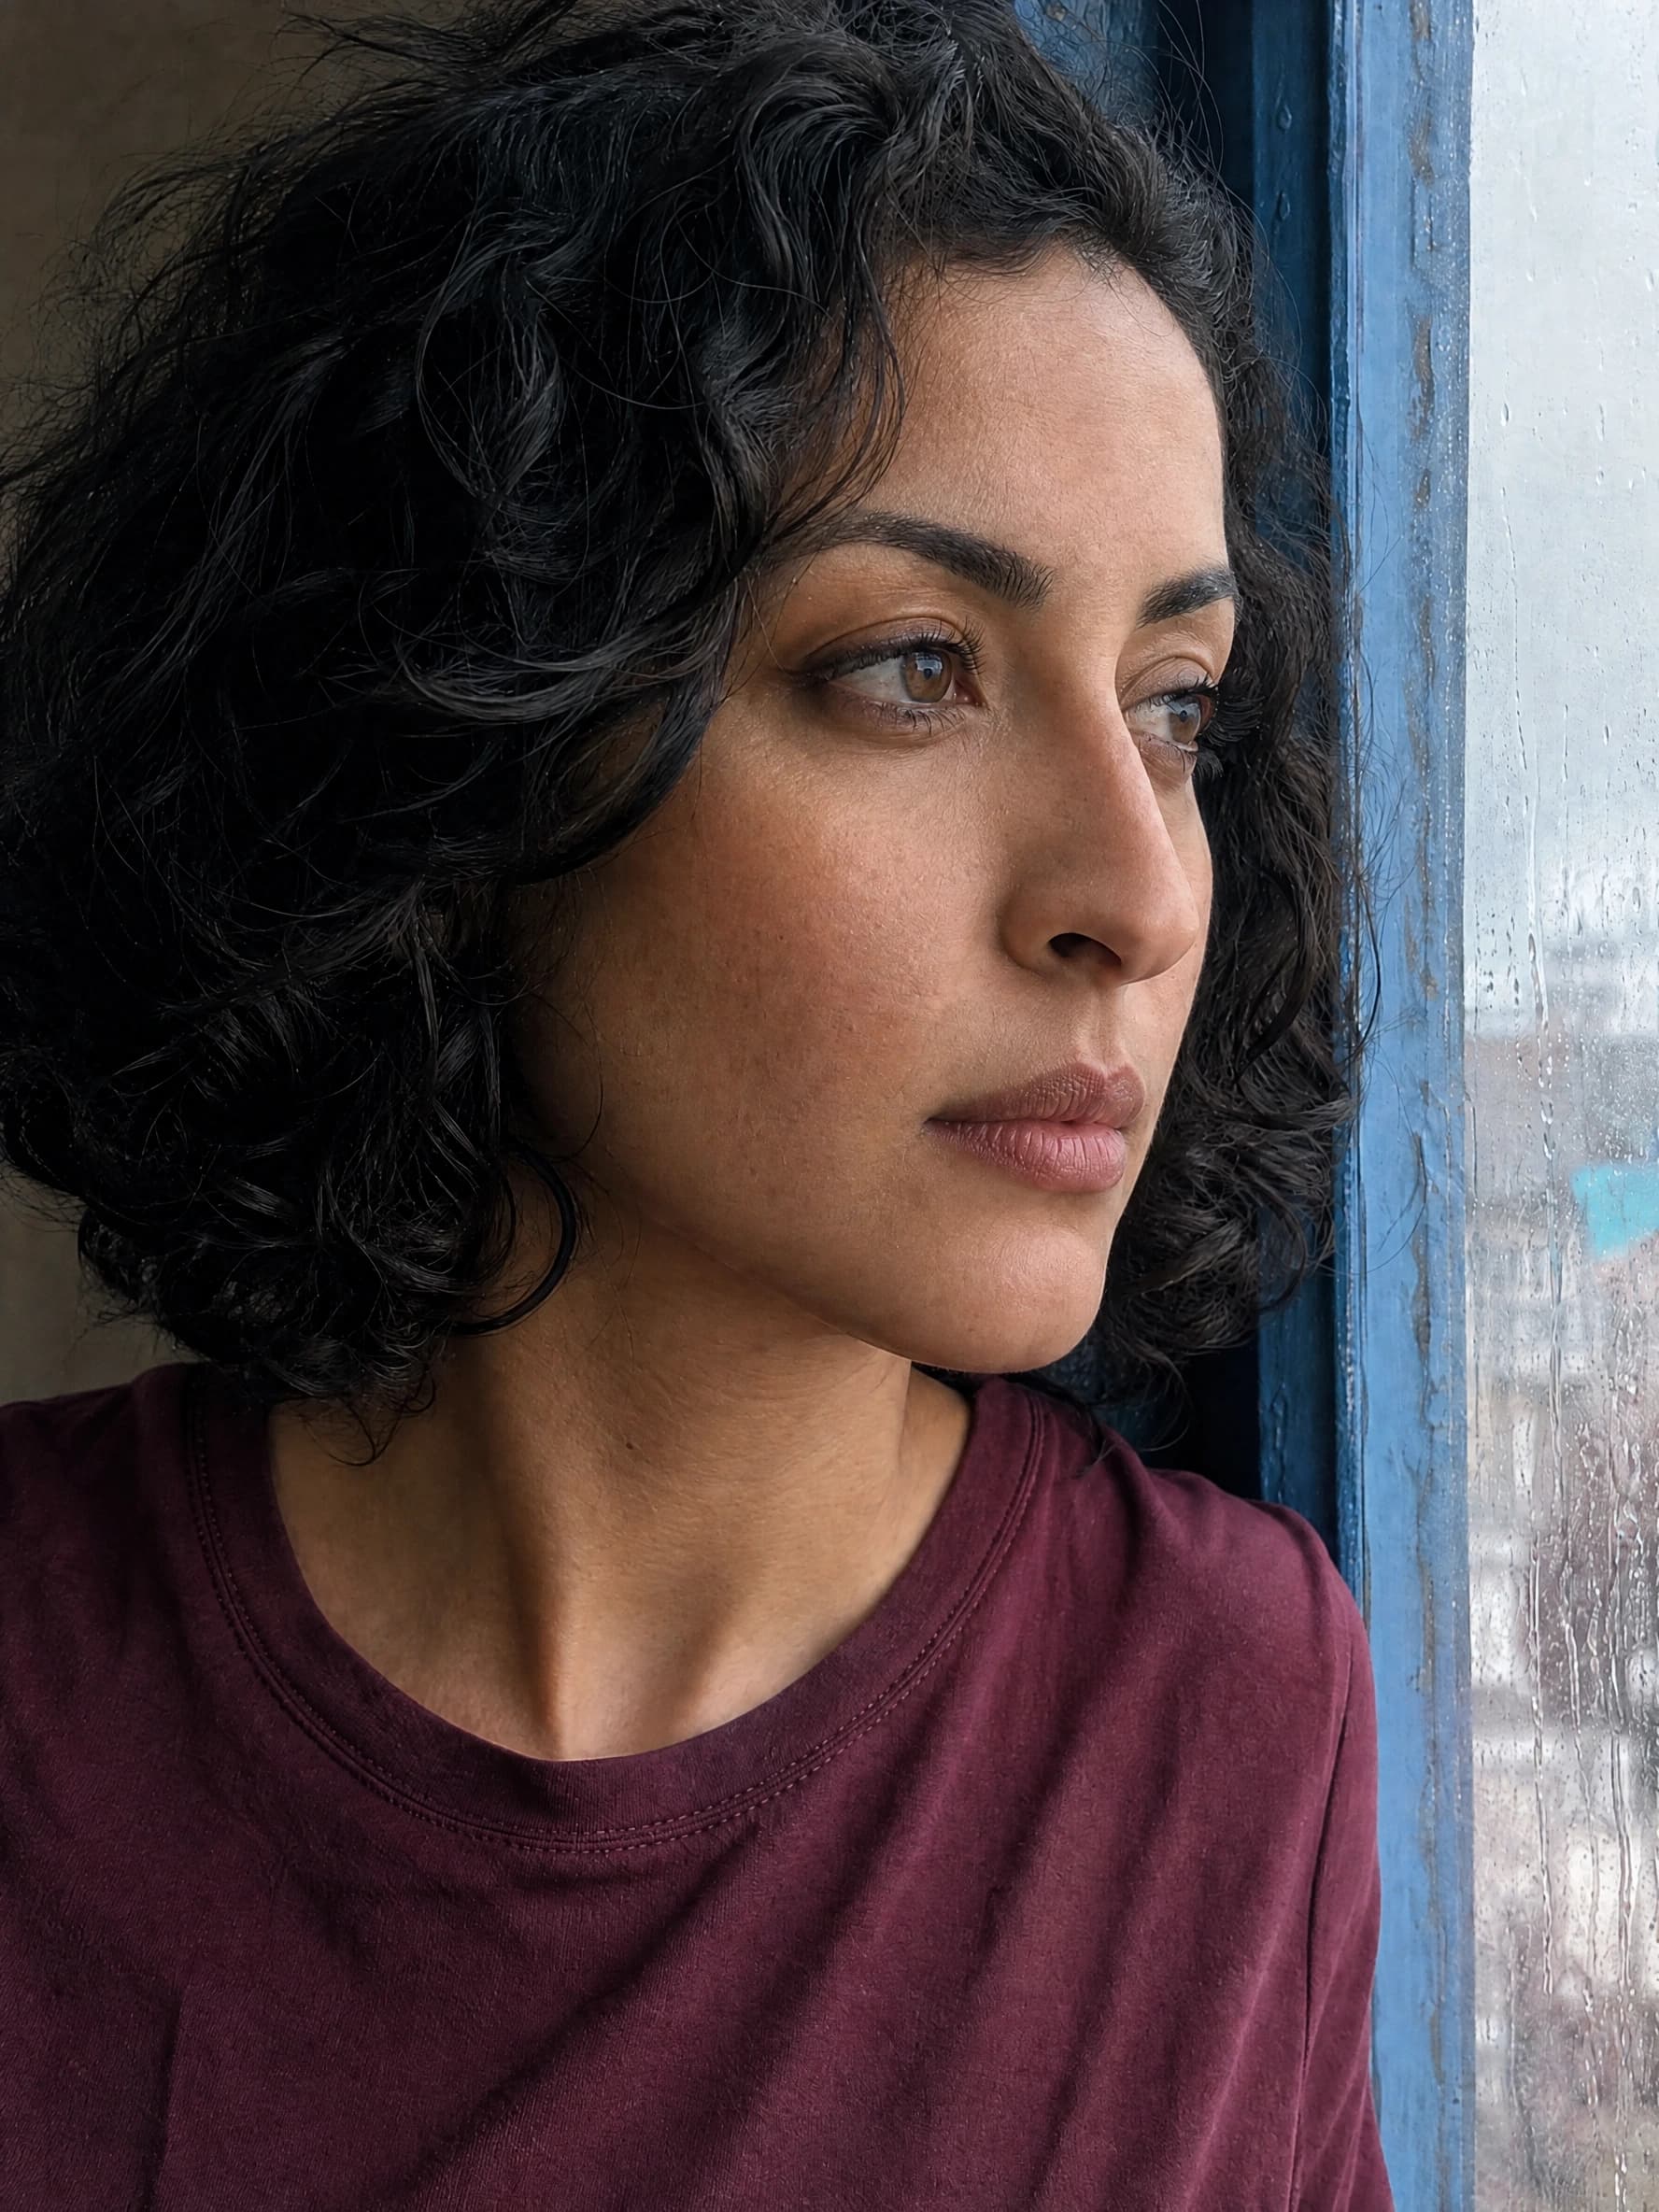
When skin looks too perfect to feel real
A portrait can have sharp eyes and convincing hair, yet still feel artificial. Overly even skin removes the small changes in surface detail that make a face believable. Increasing sharpness across the whole image does not necessarily solve that.
An AI skin texture enhancer focuses the edit on visible skin. Start with a clear portrait where the face already works; ask for a restrained texture change rather than a new face.
A focused edit
Make a focused skin-texture edit
- 01
Your source
A clear source portrait
- 02
Your direction
The texture to adjust
- 03
Your review
Natural facial detail
Small details. A more natural portrait.
Natural-looking skin is not a blanket of identical pores. Texture should follow the light, the facial contours and the distance from the camera.
- Subtle pores
- Look for small, varied detail. A harsh, evenly repeated pattern can look just as artificial as smooth skin.
- Fine skin grain
- Keep the surface gentle enough for the original lighting. Review both the close crop and the whole image.
- Natural variation
- Ask to retain existing features such as freckles. Added detail should not become new makeup or a different skin tone.
More texture.
Still your character.
The starting direction asks to keep the face, expression, age, skin tone and scene. That is an editing instruction, not a guarantee. Compare the eyes, nose, jaw and hairline before you choose the result.
Face & expression
Check the same facial landmarks, gaze and expression against the source.
Skin tone & age
Reject unwanted lightening, darkening or exaggerated lines.
Existing features
Check freckles, beauty marks and the transition into hair and facial hair.
Scene & clothing
Watch for incidental changes to the background, fabric and crop.
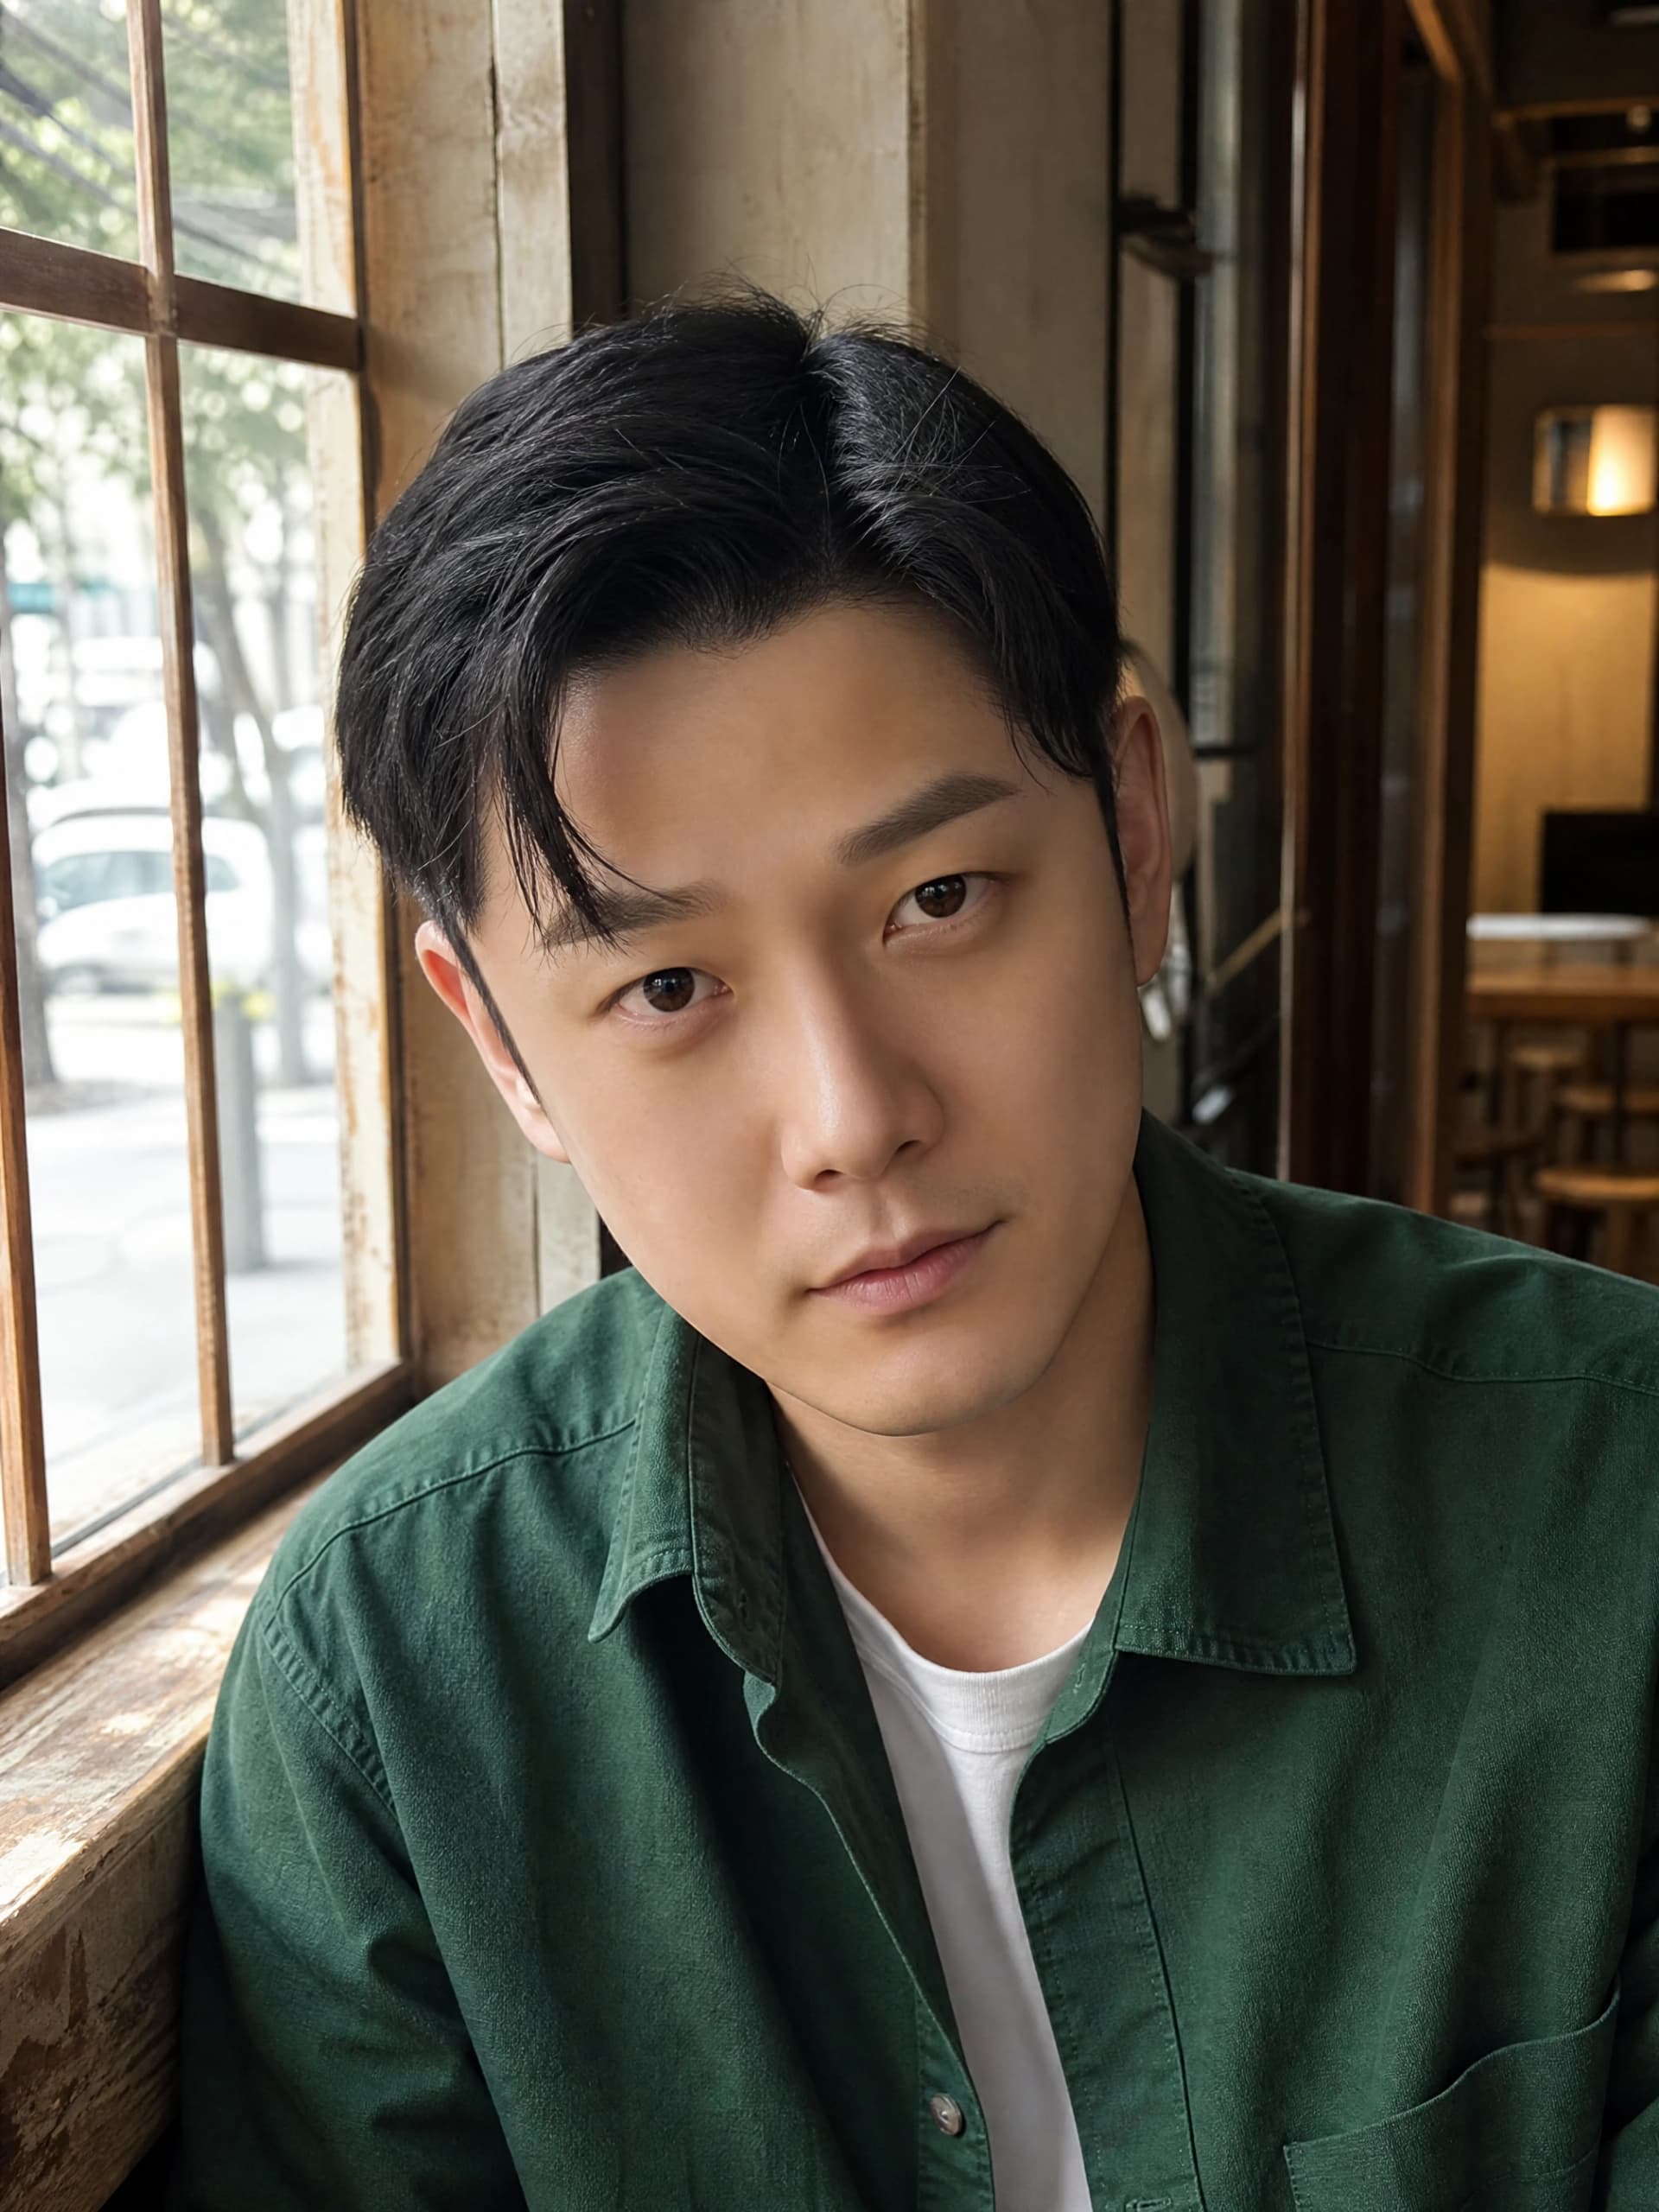
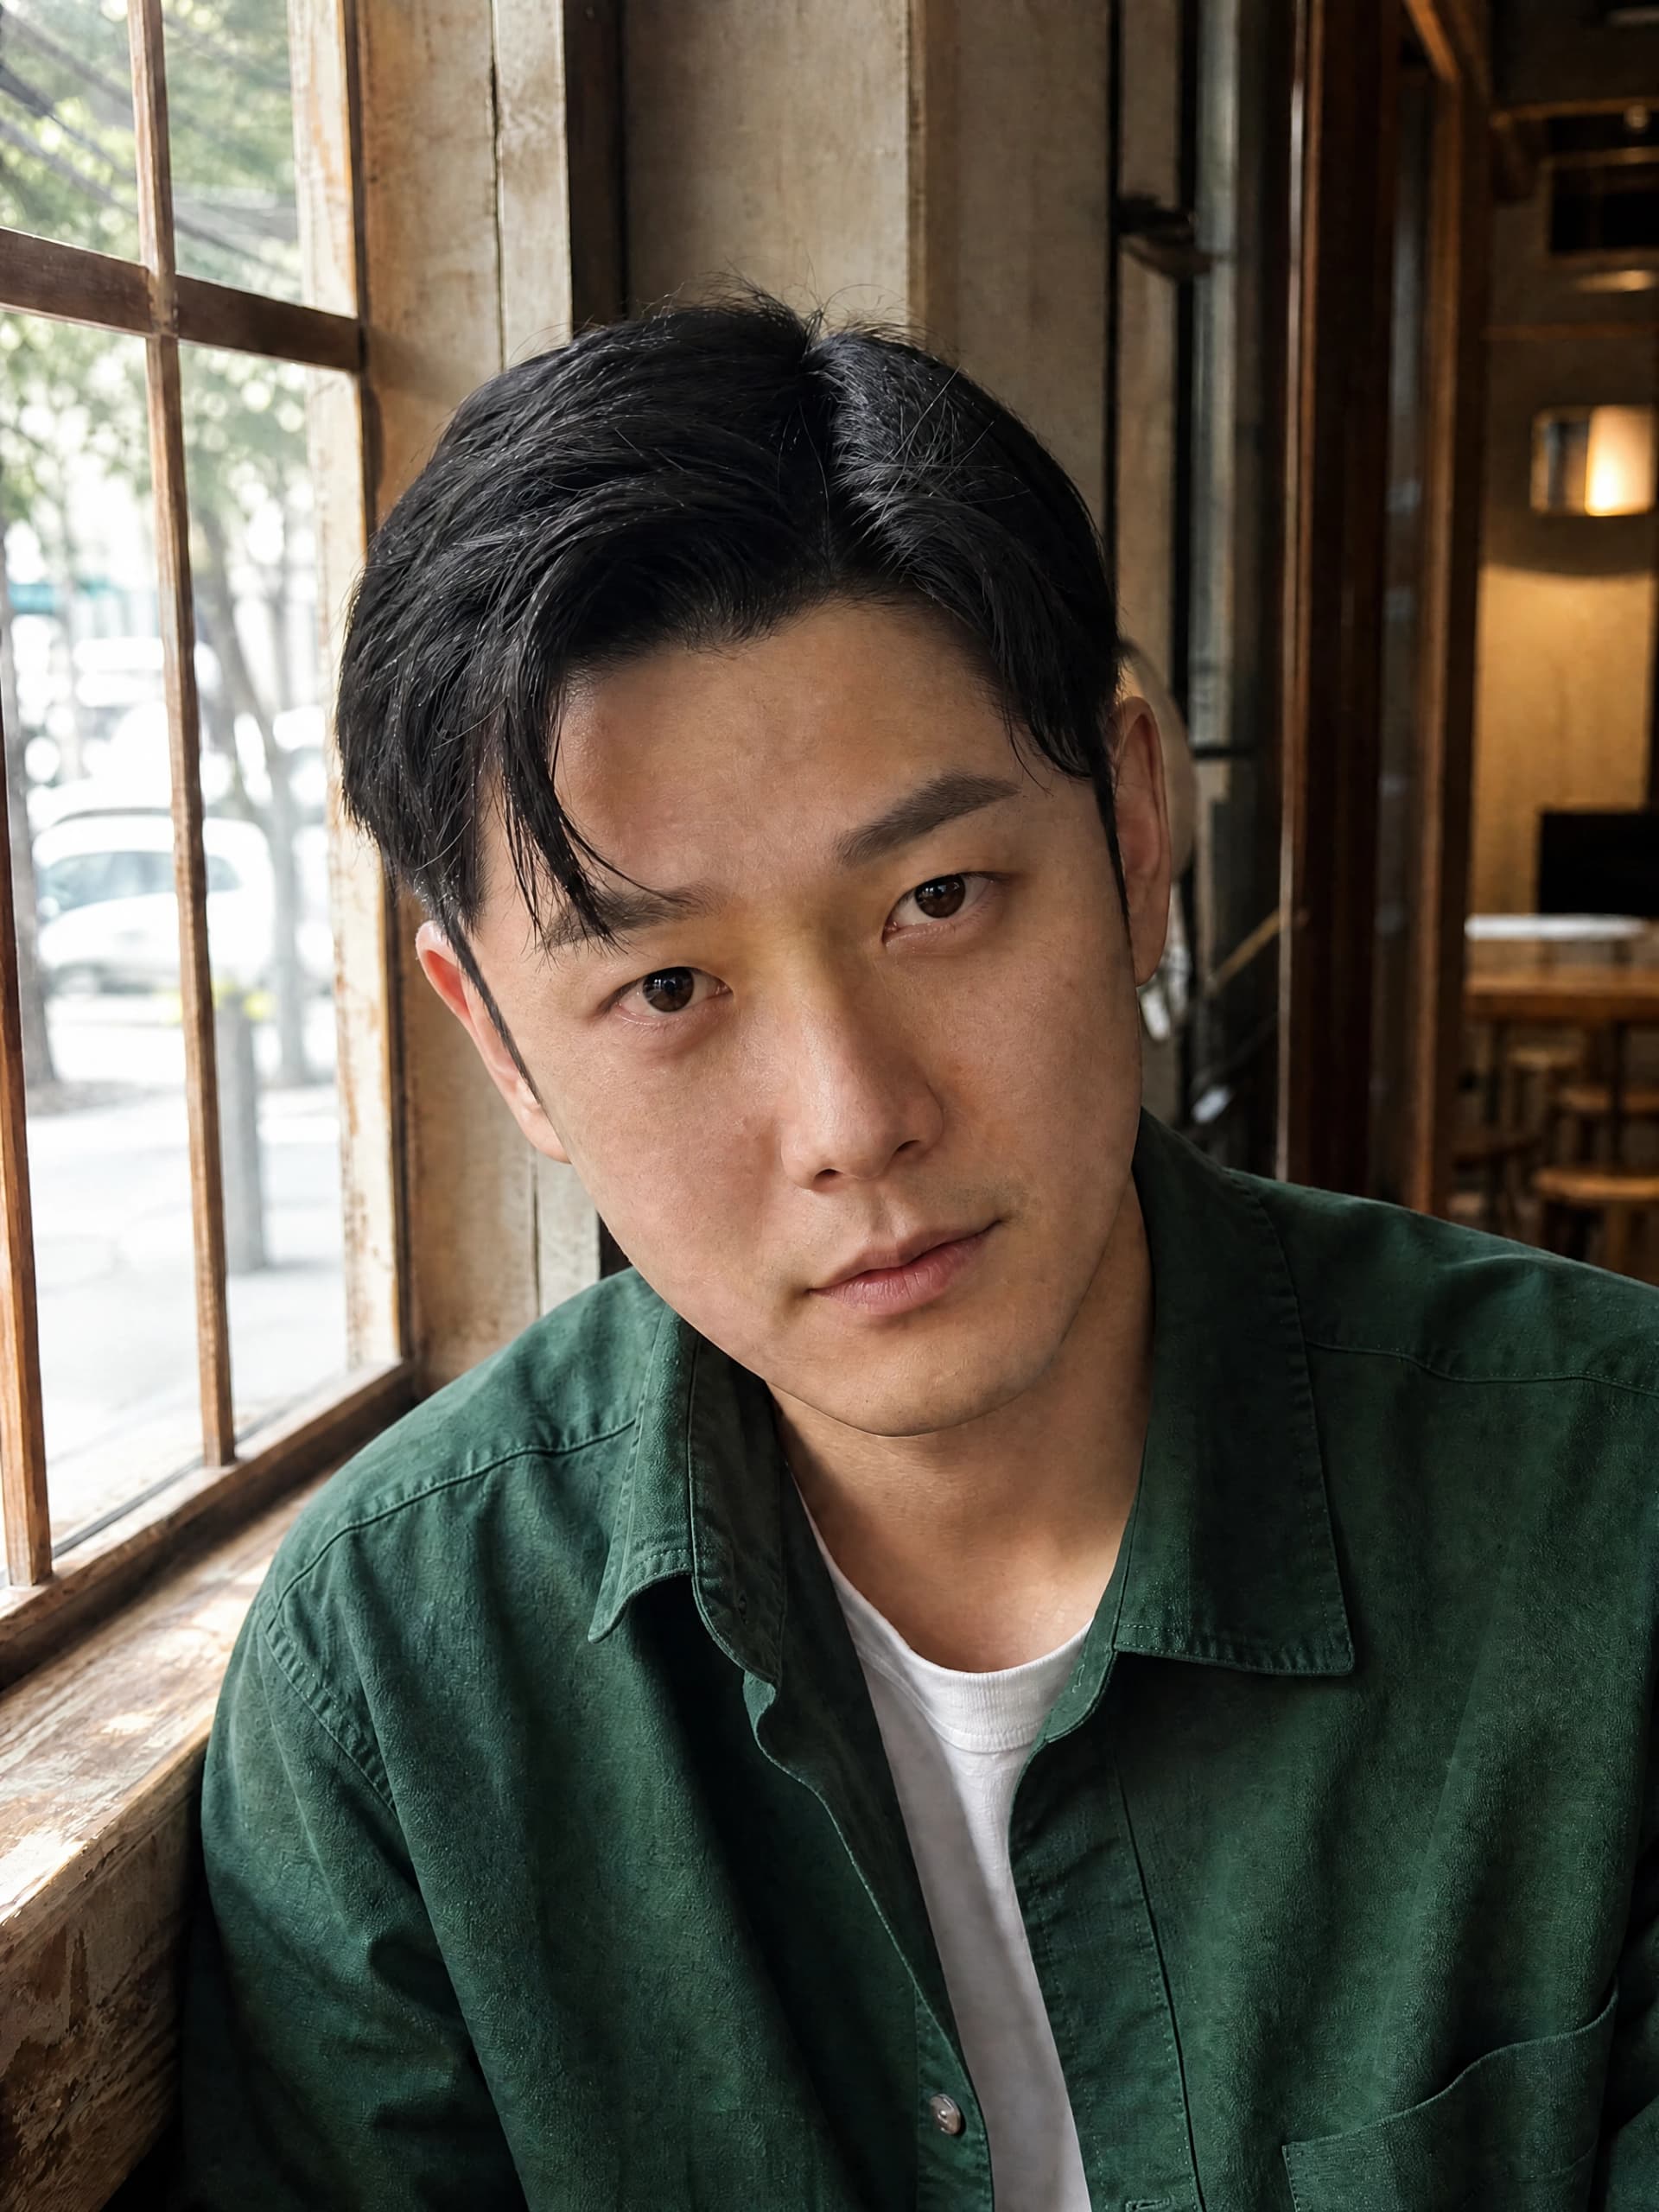
Keep the everyday moment
For a lifestyle post, the person and the scene should remain the focus. Use a subtle direction for a portrait in window light; inspect whether the edit fits the rest of the image rather than adding detail everywhere.
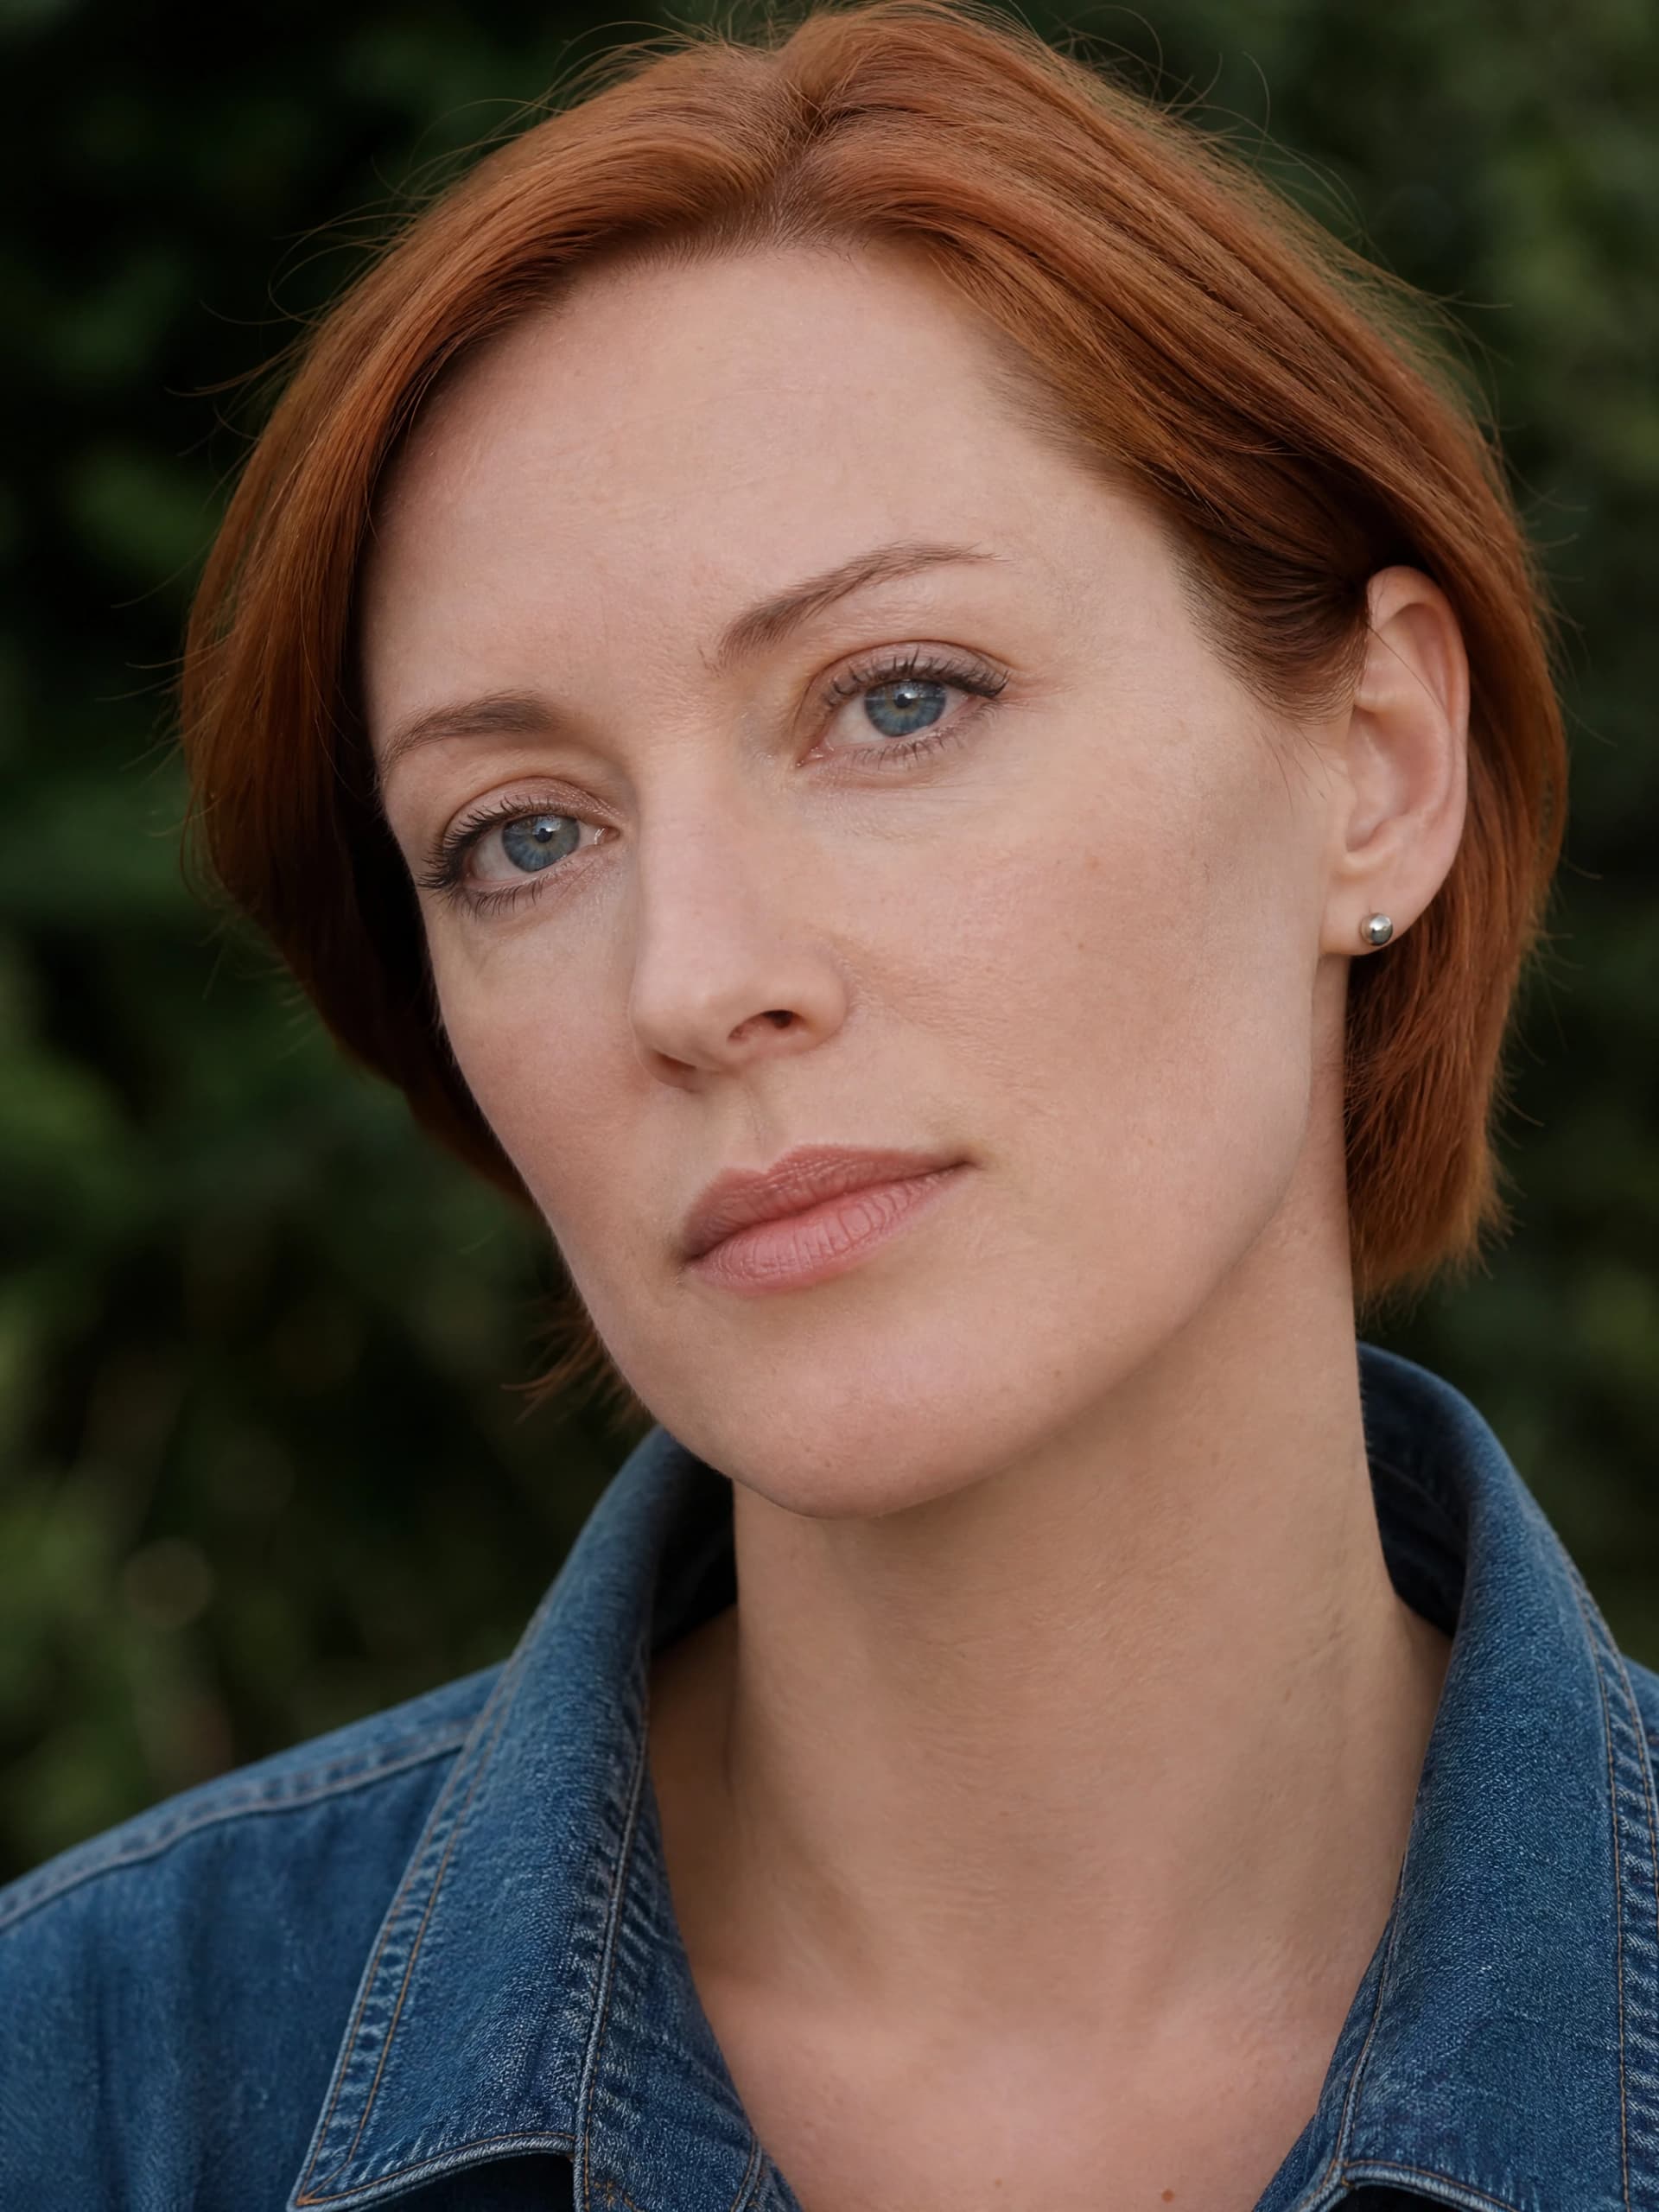
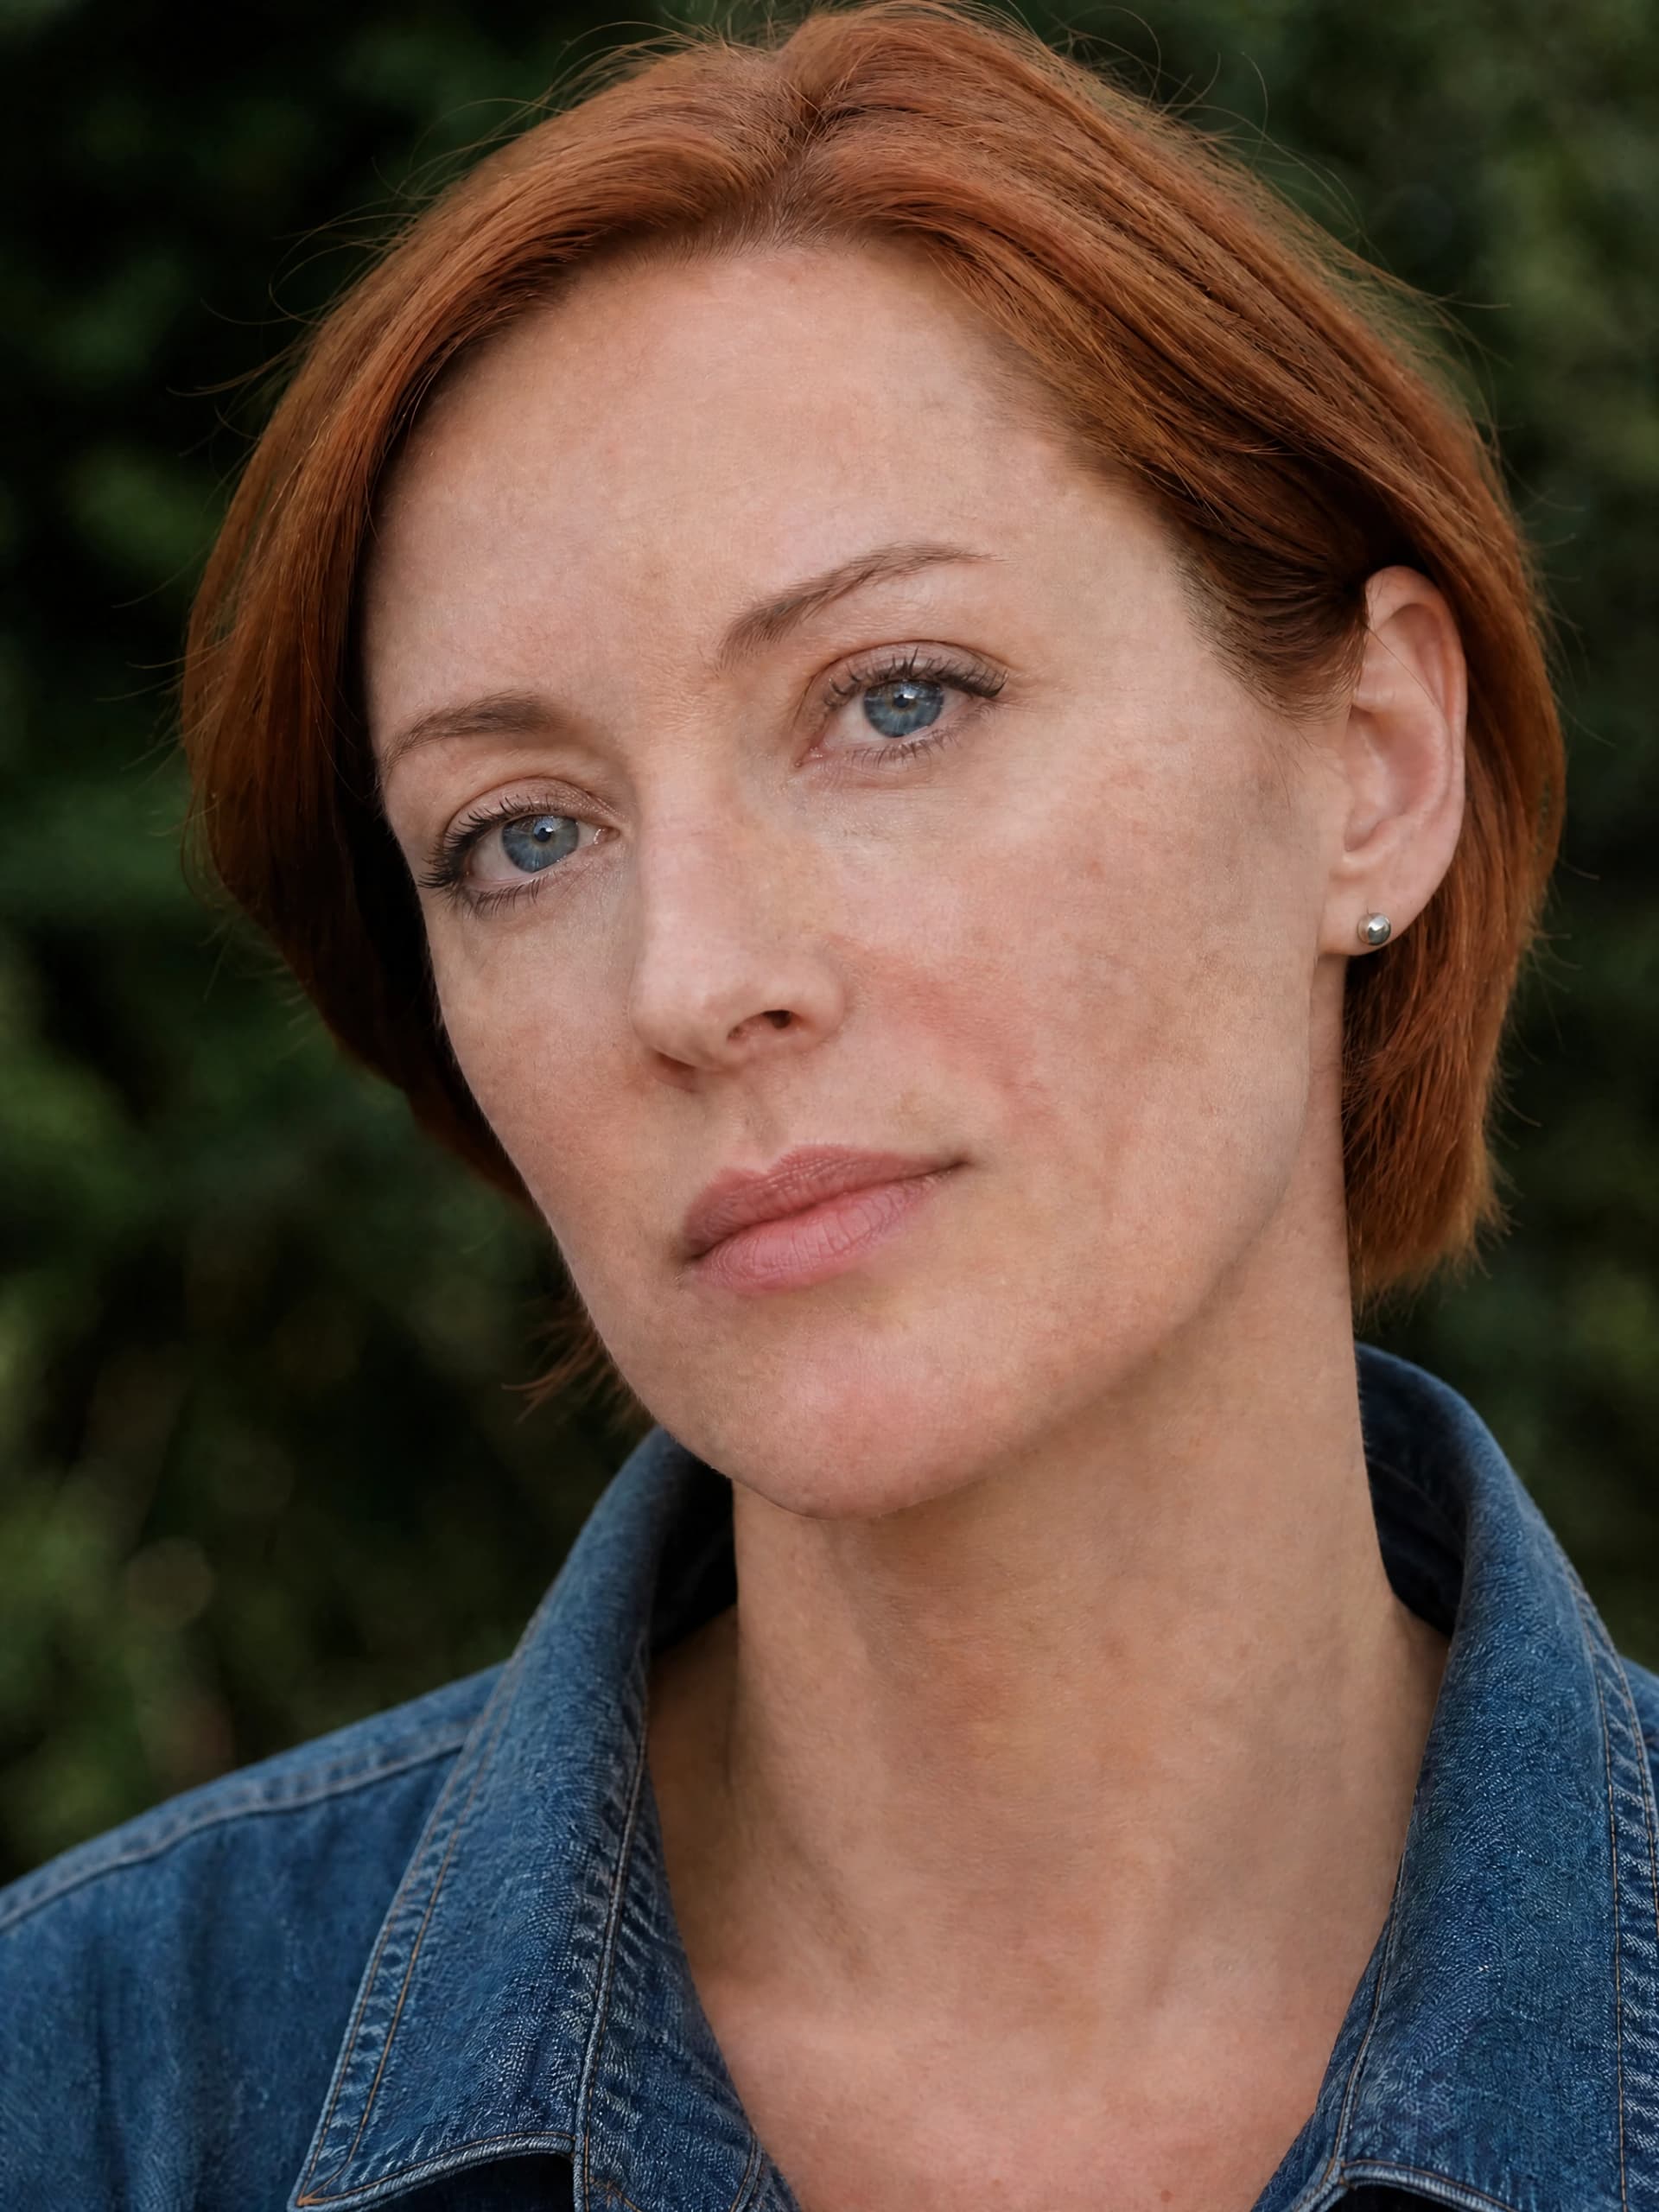
Fictional creator example. The before image is the actual input to this edit, not a separate lookalike portrait.
Close-ups deserve a closer look
Near the camera, texture is easier to judge—and easier to overdo. Check around the cheeks, nose and eyes. Preserve the character of existing freckles instead of treating every variation as something to remove.
These examples show generated skin detail. They do not reveal an original skin surface hidden beneath the source image.


Let the original light lead
Texture should sit within the portrait’s existing highlights and shadows. For darker skin, compare both the lit cheek and the shadow side; added brightness is not the same as added detail.
Different portraits need different levels of restraint. Use your own result to judge the fit, rather than expecting every input to match an example.
Try your portraitFrom your portrait to a reviewable edit
- 01
Upload
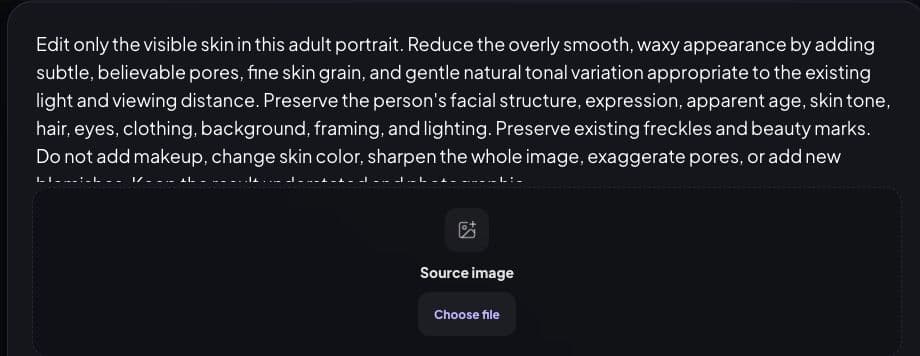
Open Studio and upload an authorized adult portrait. A skin-texture direction is already filled in; adjust it for your image.
- 02
Review & submit
Check the output settings, quoted credits and balance. Submit once, then follow the saved task while it processes.
- 03
Compare & download
Inspect the finished image beside your original. Download a result you approve, or return to the saved task in History.
Give the edit
a useful starting point
Choose a portrait with a visible face, clear focus and enough light to judge the skin. A finished AI image with good facial structure is a better starting point than a tiny screenshot or an image with major anatomical errors.
Keep the instruction focused on skin texture. Combining a new outfit, background, expression and texture in one request makes it harder to judge what changed.
Inspect at normal viewing size as well as close up. If only an extreme crop looks impressive, the edit may not improve the actual post.
Texture, smoothing or a larger image?
| Your goal | What changes | Best next step |
|---|---|---|
| Reduce the plastic look | Skin surface detail | Use a focused skin-texture edit |
| Soften visible texture | The retouching direction | Describe a gentle edit in Photo Editor |
| Export a larger image | Image dimensions | Use the separate Image Upscaler |
For broader changes, use Photo Editor. For larger dimensions, use Image Upscaler.
See the cost.
Keep the result.
Studio quotes the current credit cost for your chosen settings before submission. General credits and the first-creation experience are separate; this page does not promise an additional free edit.
How credits workWhile it processes
Follow the task status. Generation time varies; returning to the saved task avoids starting a second edit just to check progress.
If an edit fails
Check the task’s error and credit status before retrying. Failed paid generations follow the existing credit-return process.
When it is ready
Review the output, download it and find the saved image task in History. A later adjustment is a new edit with its own quote.
Before you begin
Bring your direction into Studio
- A clear source portrait
- The texture to adjust
- Natural facial detail
Before you
enhance your portrait
What does an AI skin texture enhancer do?
It edits an existing portrait to add plausible surface detail where skin looks too smooth. This can include subtle pores, fine skin grain and gentle tonal variation. The detail is generated, not a recovery of a person's original pores.
Will it keep the same face and skin tone?
The starting instruction asks to preserve facial structure, expression, age and skin tone. An edit can still change those details. Compare the original and result, and reject changes that make the person look different.
Can I enhance skin texture for free?
You can use available general credits toward an eligible edit. Studio shows the current cost and balance before you submit. This tool does not include a separate unlimited free allowance; the first-creation experience has its own defined benefits.
Which photos should I upload?
Use a clear image of an adult whose likeness you have permission to edit, with visible skin and enough light to judge detail. Use a supported image format shown by the upload control. A tiny, heavily blurred or obstructed face gives the edit less useful information.
Is skin texture enhancement the same as upscaling?
No. Texture editing changes the appearance of skin; upscaling increases image dimensions. If your portrait is too small, use the separate Image Upscaler and review whether its result still needs a skin edit.
Does it work on real photographs?
You can upload an authorized adult photograph, including an over-retouched portrait. Added texture is an interpretation, not a reconstruction of the subject's true skin. Do not present an edited image as evidence of a skincare result.
Where is my finished image saved?
A successfully saved Studio task appears in your image History. Open the result to review and download it. You can return to the task after refreshing instead of submitting the same edit again.
A little texture.
A considered finish.
Start with one portrait. Keep the changes you can see and the character you recognize.
Enhance skin texture
Plan Content
Measure Engagement
Build Your Profile
Price Your Work
Write Post Copy
Brand Partnerships