
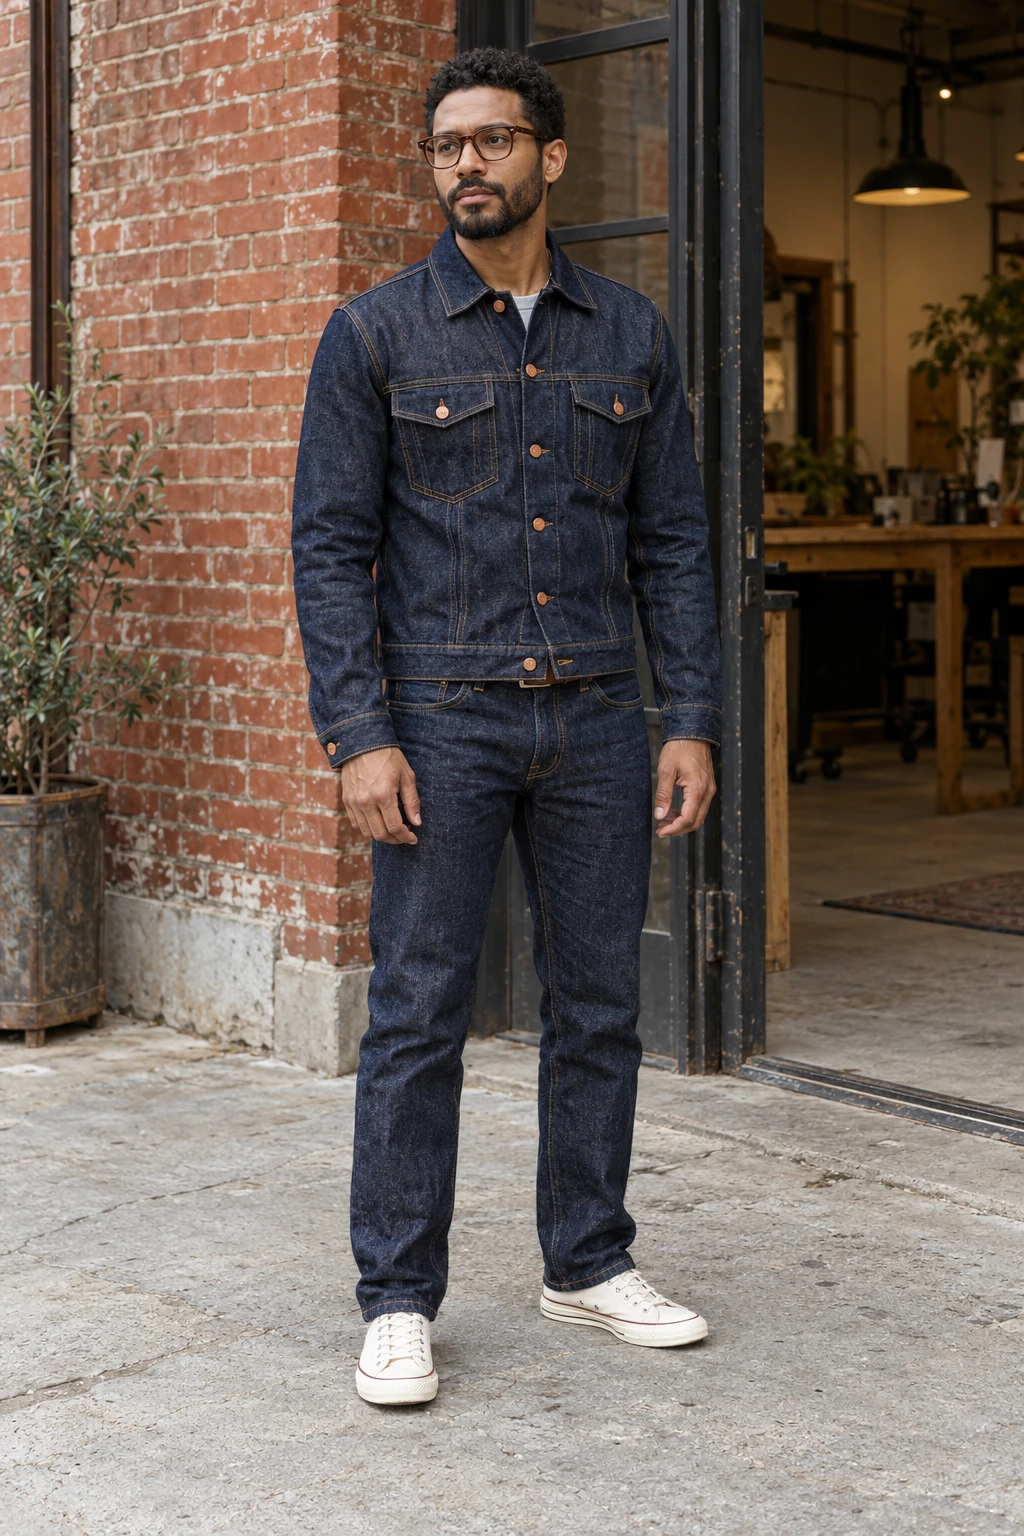
- A face reference and a clothing reference solve different consistency problems.
- Keep the outfit brief fixed; vary one scene instruction at a time.
- Judge construction details at full size, not just the overall blue-denim look.
- Our 12-frame demonstration is small and partly uncontrolled; use it to inspect failure modes, not predict success rates.
Why Does AI Change Outfits Between Photos?
An outfit description names a category; a reference image shows a particular construction. “Blue denim jacket” leaves room for many collars, pocket shapes, button counts and washes. A new generation can satisfy that description while producing a different garment.
Lighting can make indigo look gray or cyan without changing the imagined fabric. Other changes are structural: a pointed collar becomes rounded, cuffs lose fastenings, a print moves, or a jacket becomes shorter. Separate plausible light and folds from redesigned clothing. A believable photo can still be an inaccurate fashion image.
A character portrait may show too little clothing to constrain the outfit. Crossing arms hides the front closure; a tight crop hides cuffs and trousers. Asking for a new outfit, season or styling mood in the same prompt can also conflict with your preservation instruction. Remove those contradictions before adding more adjectives.
Which of the Three Reference Methods Should You Use?
Use text for the brief, a person image for identity, and an outfit image when garment details matter. More inputs are useful only when their roles are clear and the selected model accepts them.
| Method | Best fit | Main limitation |
|---|---|---|
| A · Text Prompt Only | Exploring a general outfit style before a final garment exists. | Words do not uniquely identify construction or a particular face. |
| B · Character Photo Reference | A clear full-length character photo already wearing the desired outfit. | A face-only portrait or obscured clothing provides weak garment evidence. |
| C · Character + Outfit References | Separate identity and garment information; highlight small details. | Conflicting references can compete; extra inputs do not guarantee improvement. |
An AI clothing reference image should show the garment’s actual construction. Save an approved full-length look as the baseline; add authorized side or rear views when those details matter.
What Does Published Research Say About Garment Consistency?
Research supports checking garment attributes separately, but it does not establish a universal best model for your photo series. Park, Choi and Choi’s 2026 Fashion and Textiles study evaluated ghost mannequin photography: transforming worn garments into images without the wearer.
Garment Consistency in Published Research
The study assessed 20 garment attributes. Its practical lesson: matching color does not establish matching buttons, pockets or seams. These historical scores do not describe our current models.
What Happened in Our 12-Image Reference Experiment?
We kept all first outputs, including details that failed review. One original adult character, one six-button indigo denim outfit, four scene briefs and three reference conditions produced 12 images. Each condition used the same base clothing description and the same requested portrait framing.
A had no explicit image input; B received the full character photo; C received that photo plus a direct torso crop. The crop adds detail emphasis, not independent garment evidence. This is therefore a test of these particular input packages, not proof that a separate garment photograph is always better.
Built-in image generation tool, October 18, 2026; requested and returned 1024 × 1536. Underlying model/version, seed, quality level and reference strength were not exposed. Shared conversational context was not isolated, including for A. There was one generation per cell, no experimental rerolls and no hidden rejected results. It is an exploratory editorial demonstration, not a controlled benchmark or Studio model test.
Scoring: what counts as keeping the same outfit?
AI-assisted visual inspection checked four visible properties: indigo color; jacket/jean cut, pointed collar and two flap pockets; denim texture with golden double stitching; and copper hardware, including six front buttons, pocket buttons and visible cuff buttons. Each is pass/fail. All four must pass for an outfit pass. Occluded details are not assumed correct; unresolved critical details cannot pass. Natural folds and lighting shifts are allowed.
An AI assistant performed this visual review, not a blinded human panel. The rubric excludes identity, pose, microscopic weave, exact fit, unseen surfaces and calibrated color. Open the full-size outputs to inspect the judgments.
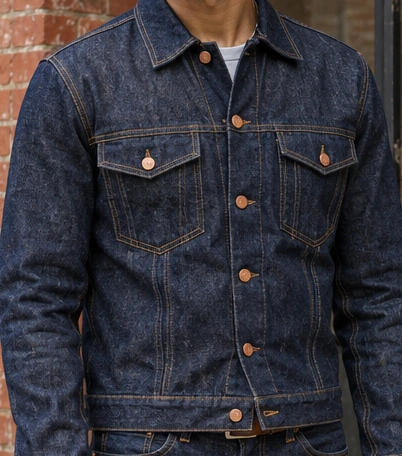
Café: the three first outputs
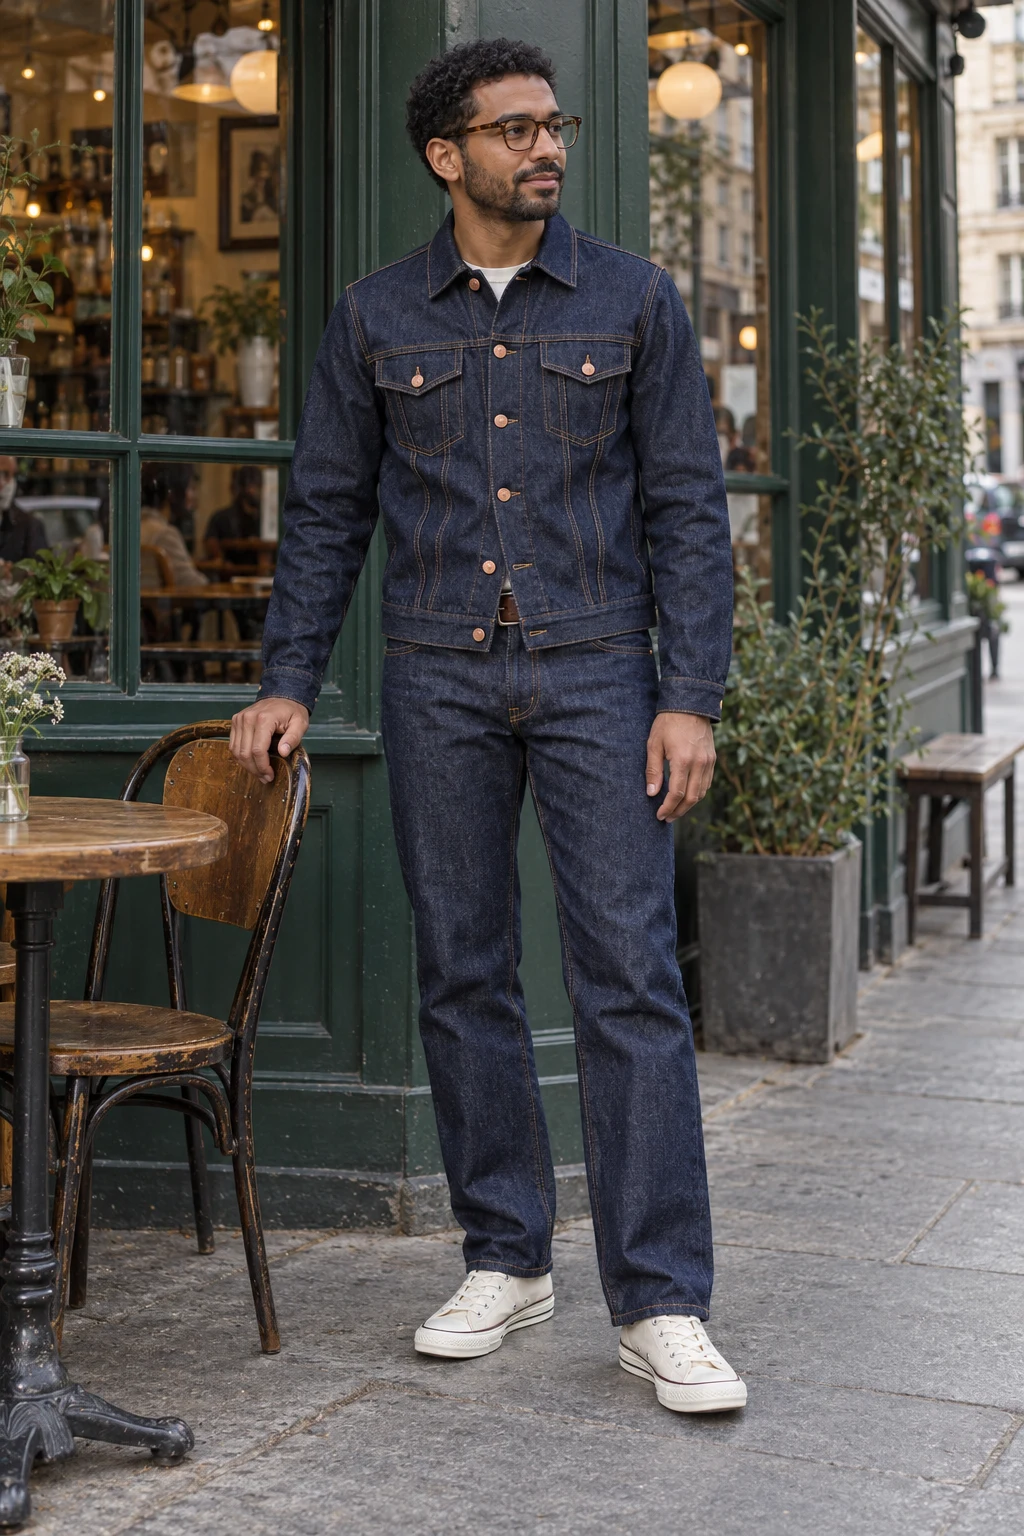
Checklist: 3/4 · Needs correction
Exact prompt & input log: a-cafe
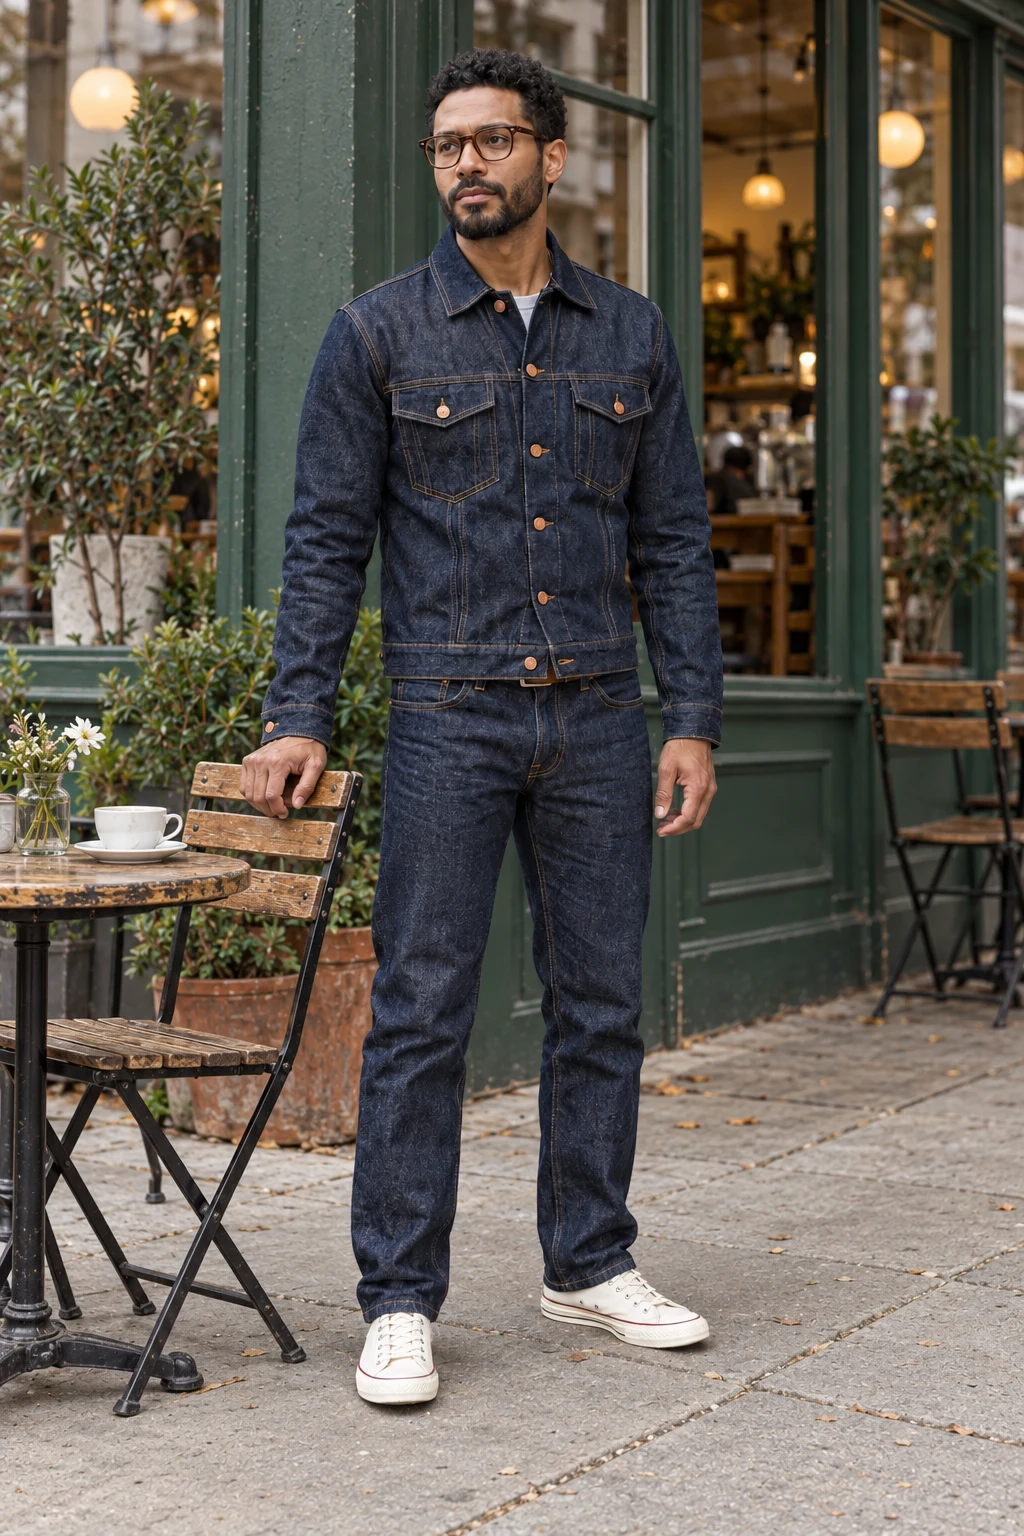
Checklist: 4/4 · Outfit pass
Exact prompt & input log: b-cafe
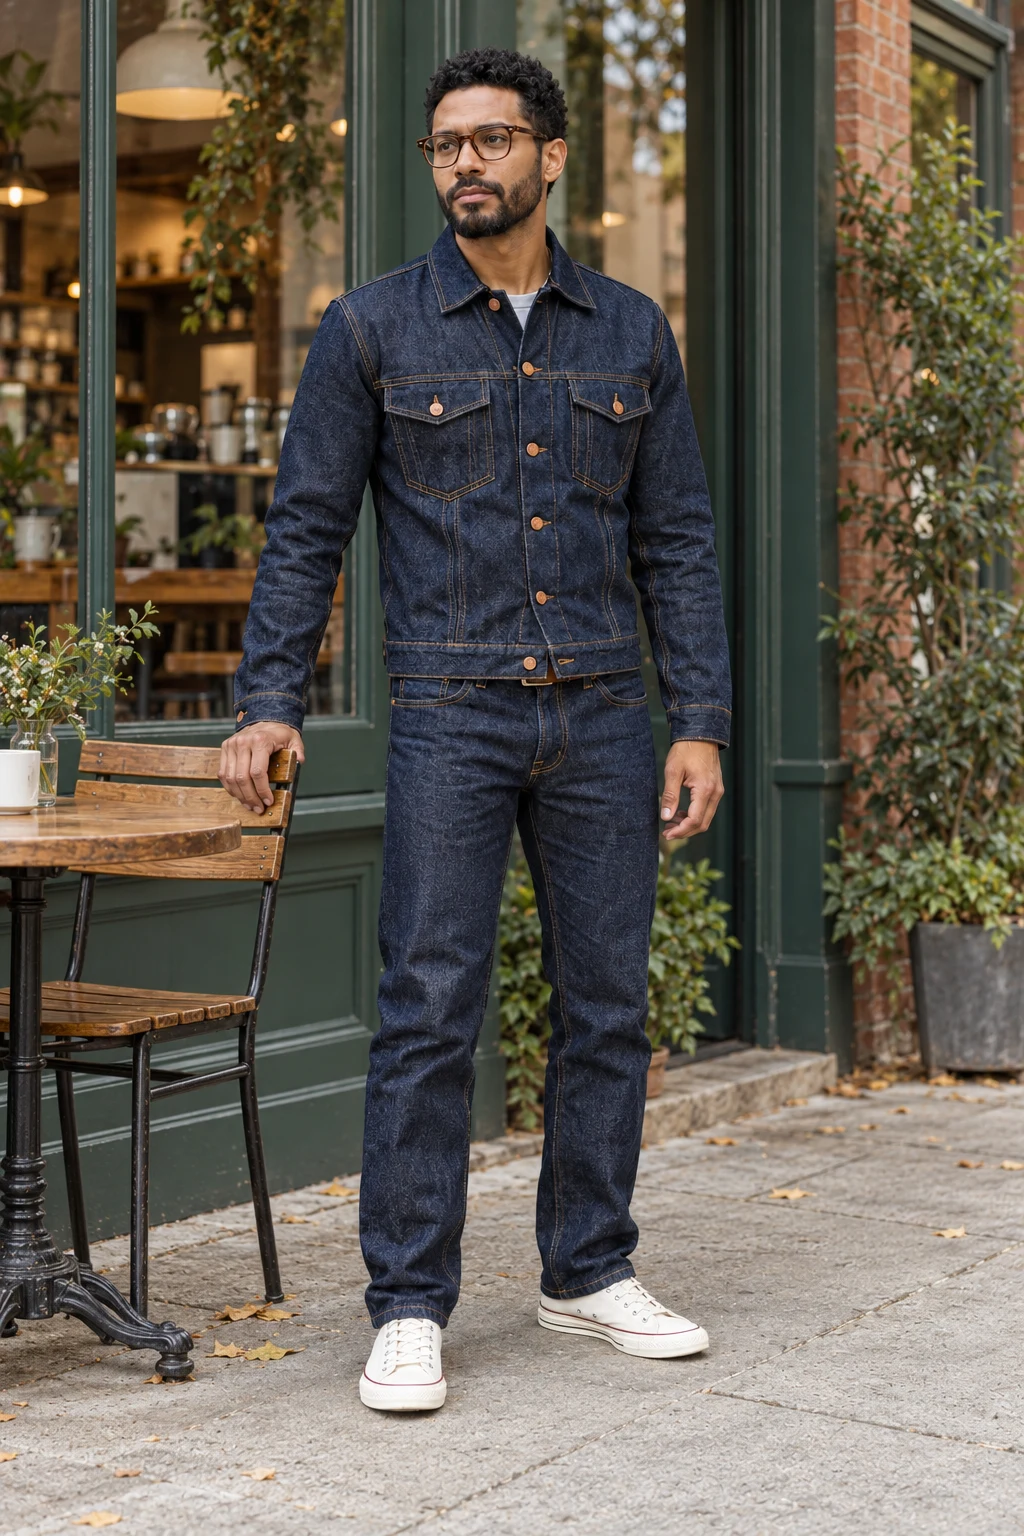
Checklist: 4/4 · Outfit pass
Exact prompt & input log: c-cafe
Street: the three first outputs
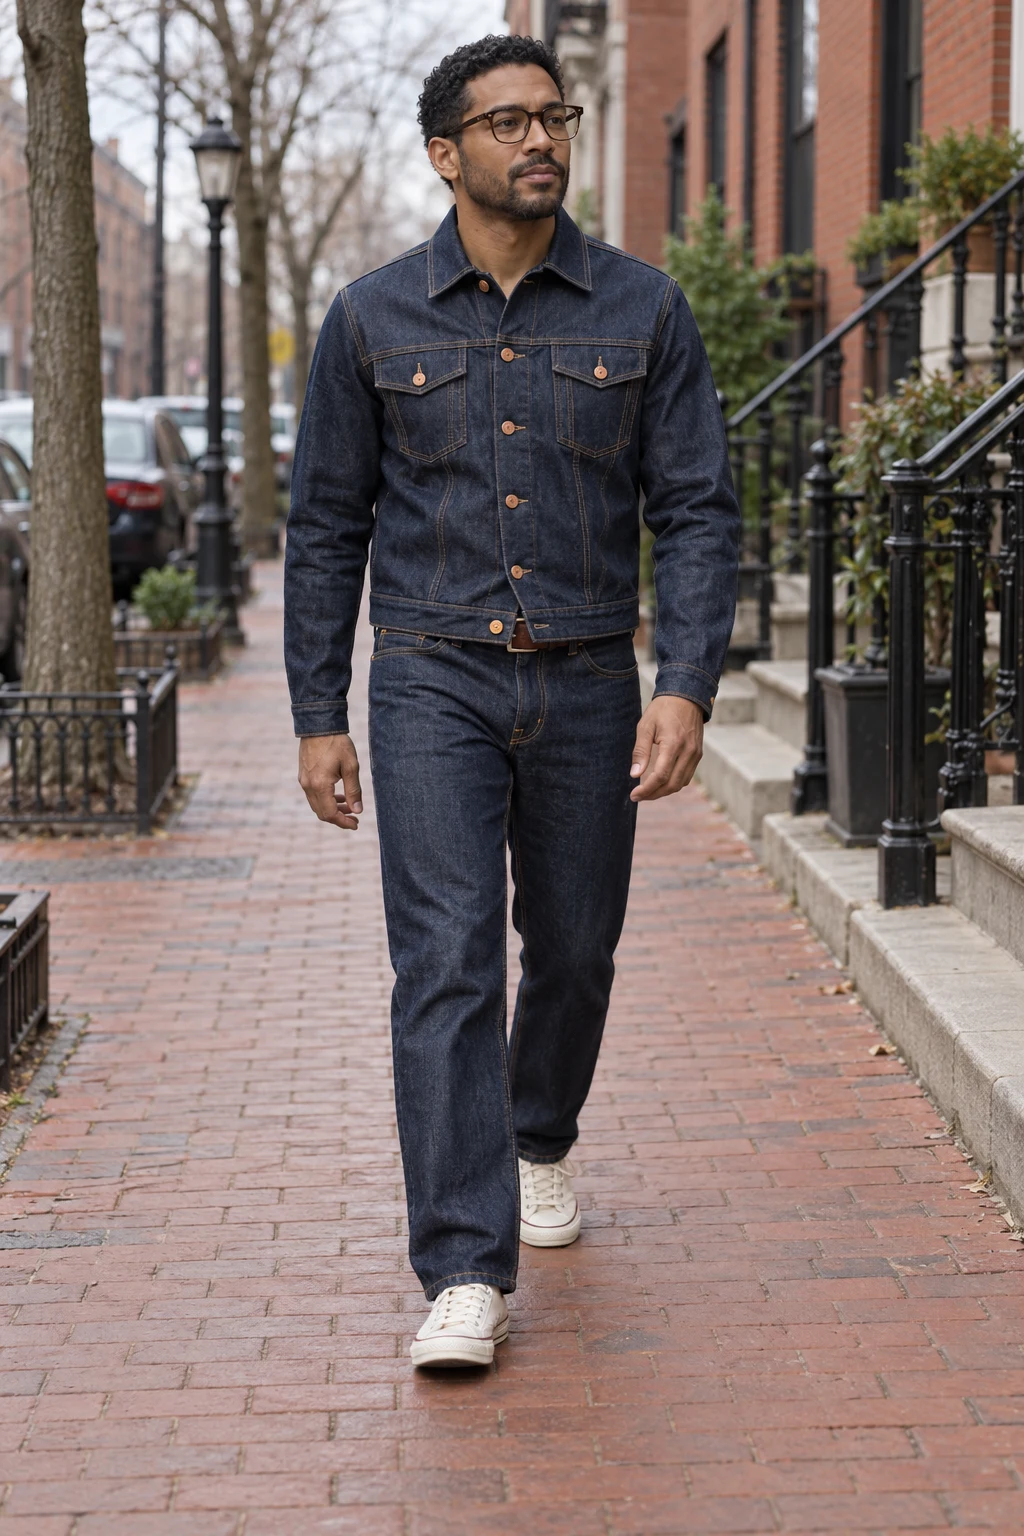
Checklist: 3/4 · Needs correction
Exact prompt & input log: a-street
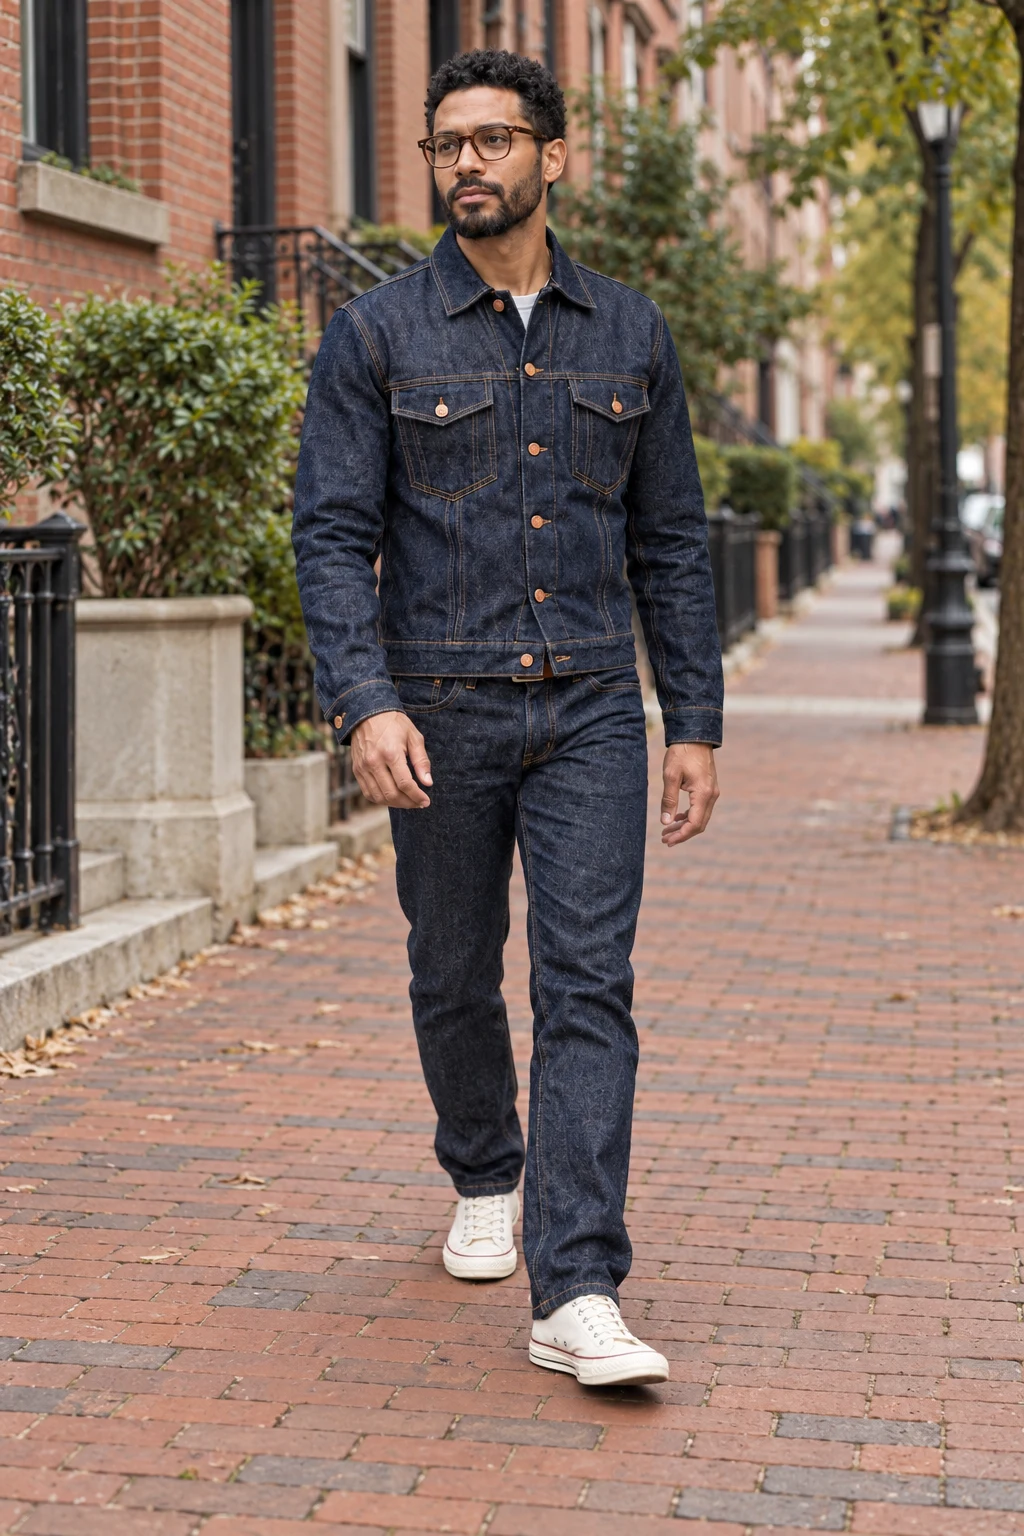
Checklist: 4/4 · Outfit pass
Exact prompt & input log: b-street
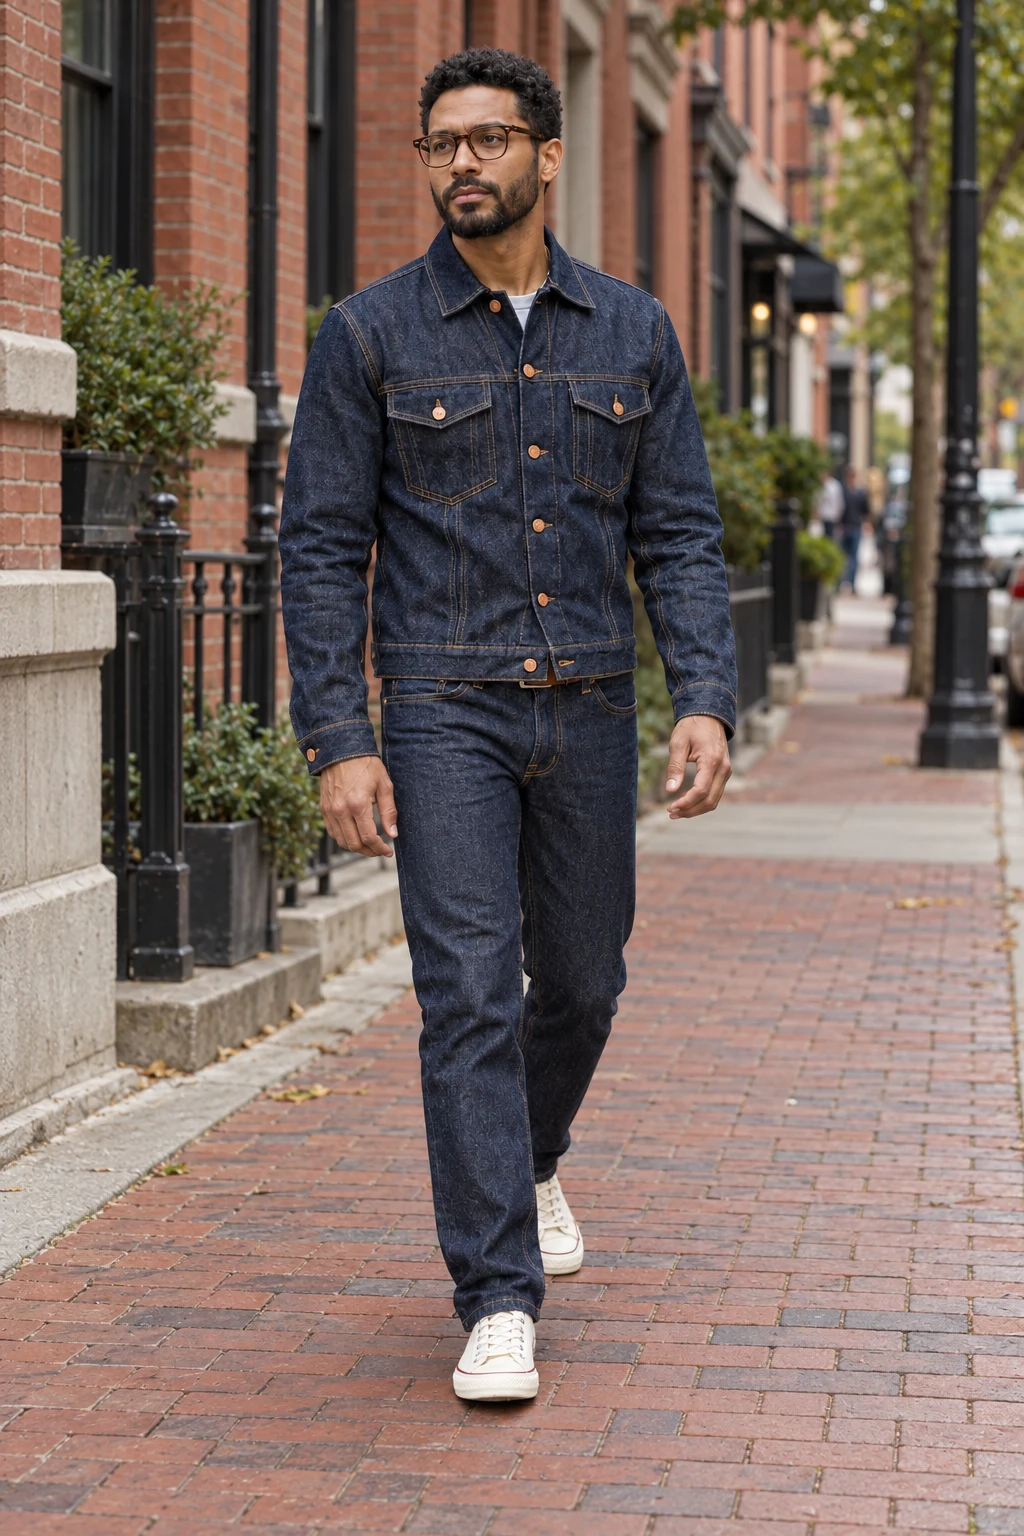
Checklist: 4/4 · Outfit pass
Exact prompt & input log: c-street
Studio: the three first outputs
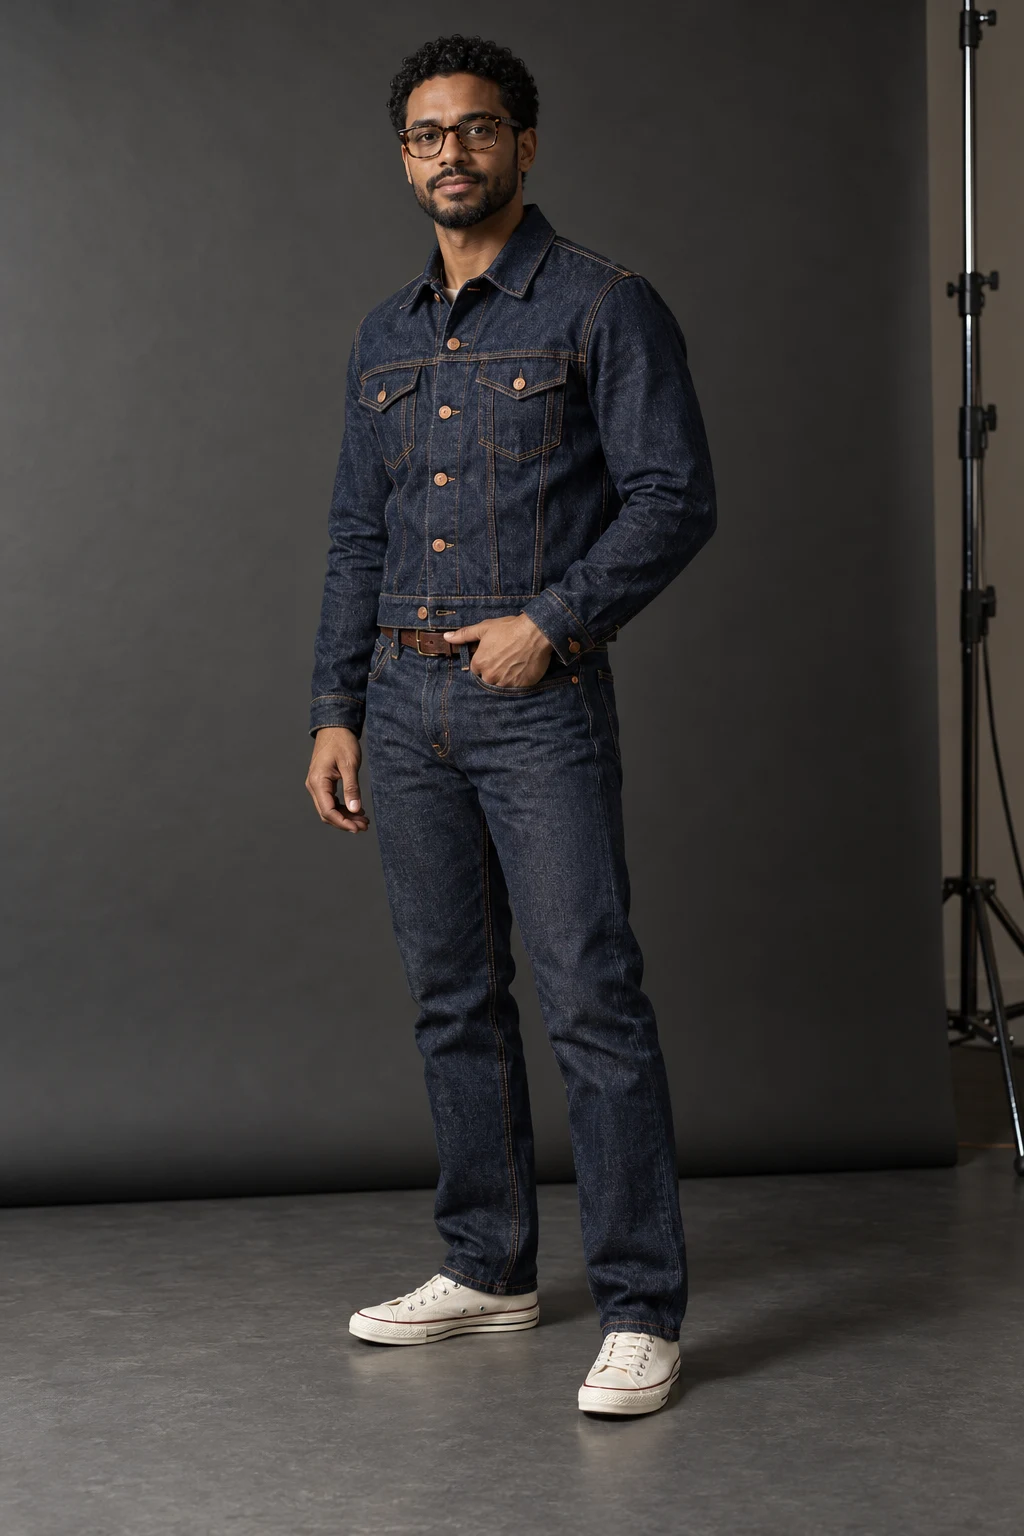
Checklist: 4/4 · Outfit pass
Exact prompt & input log: a-studio
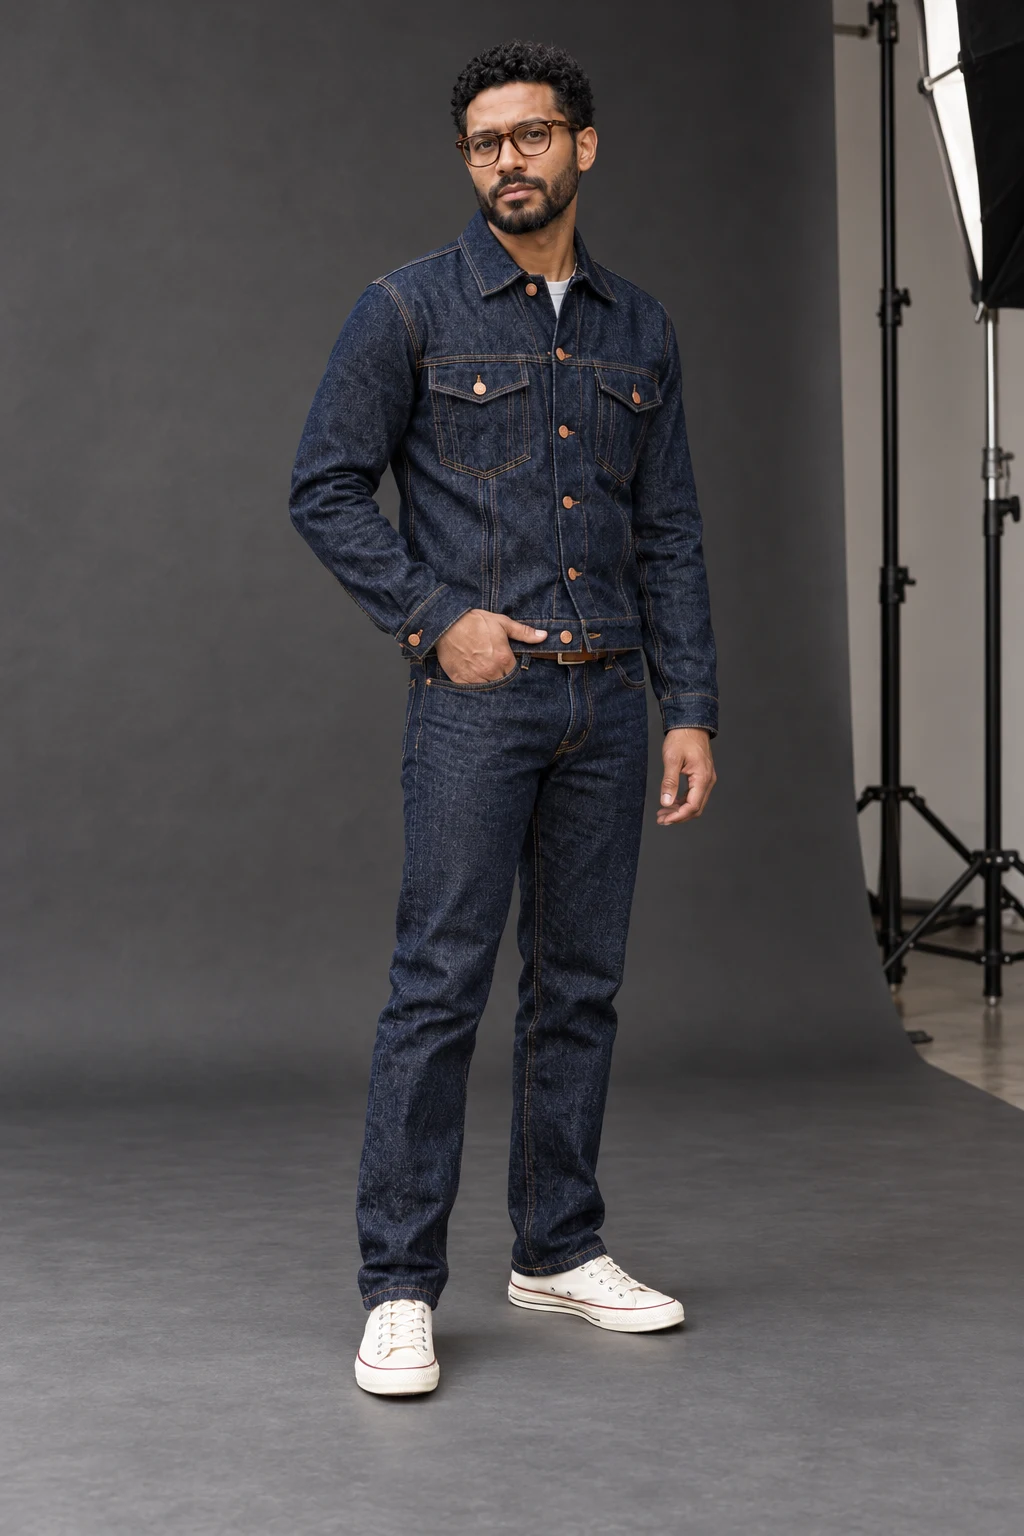
Checklist: 4/4 · Outfit pass
Exact prompt & input log: b-studio
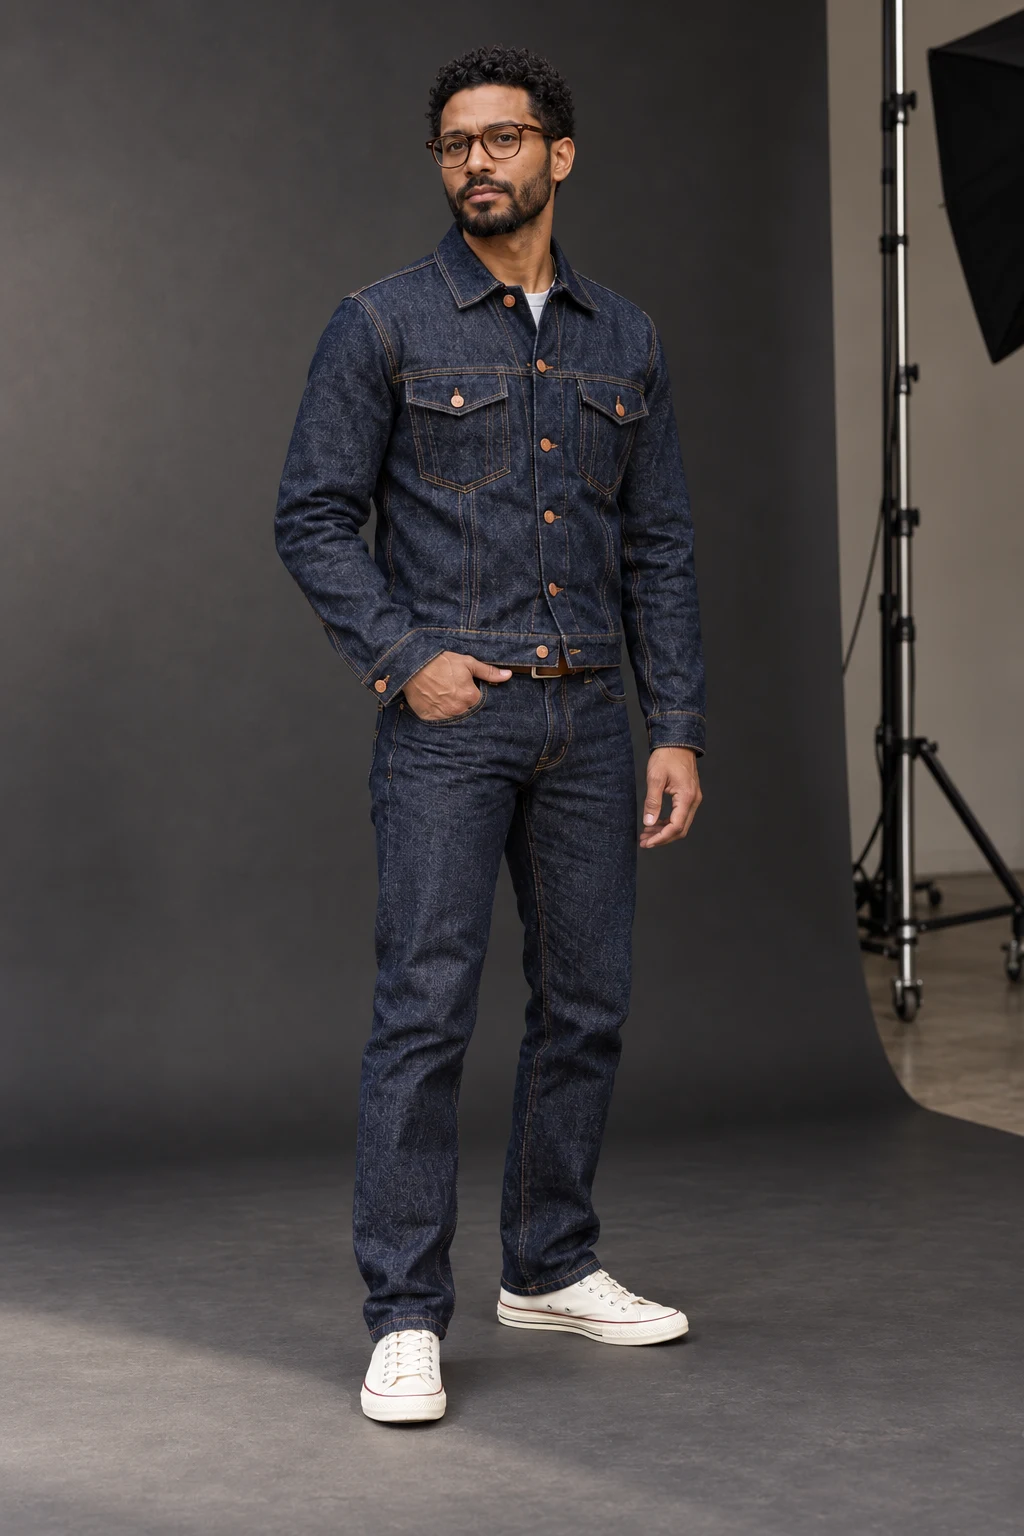
Checklist: 4/4 · Outfit pass
Exact prompt & input log: c-studio
Beach: the three first outputs
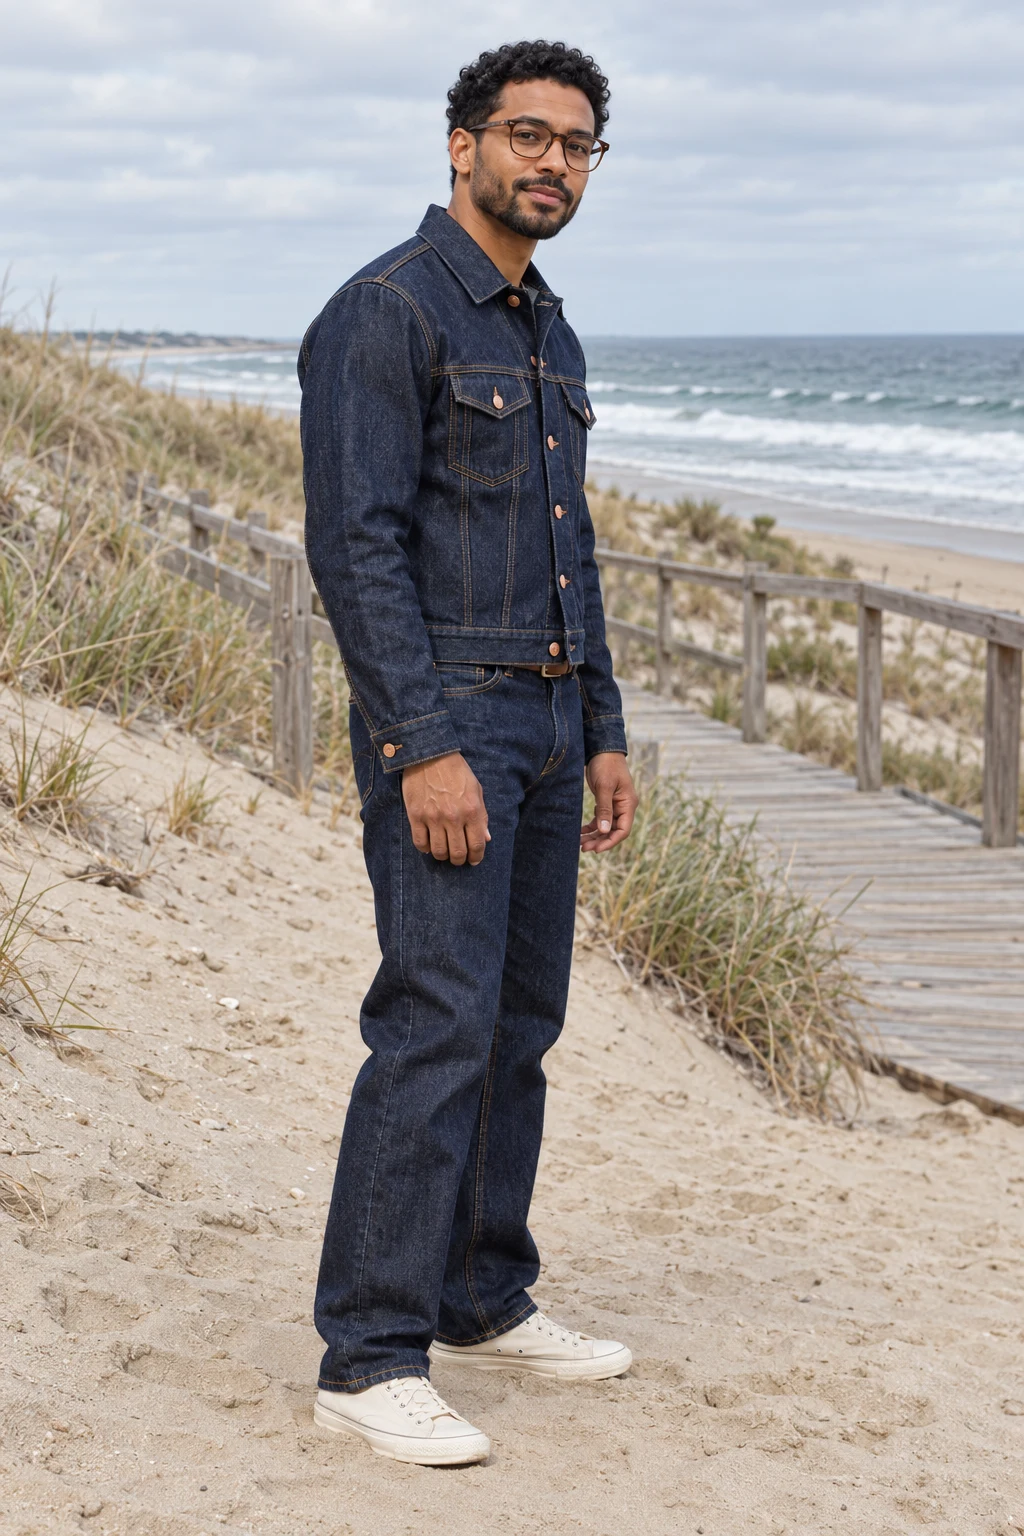
Checklist: 4/4 · Outfit pass
Exact prompt & input log: a-beach
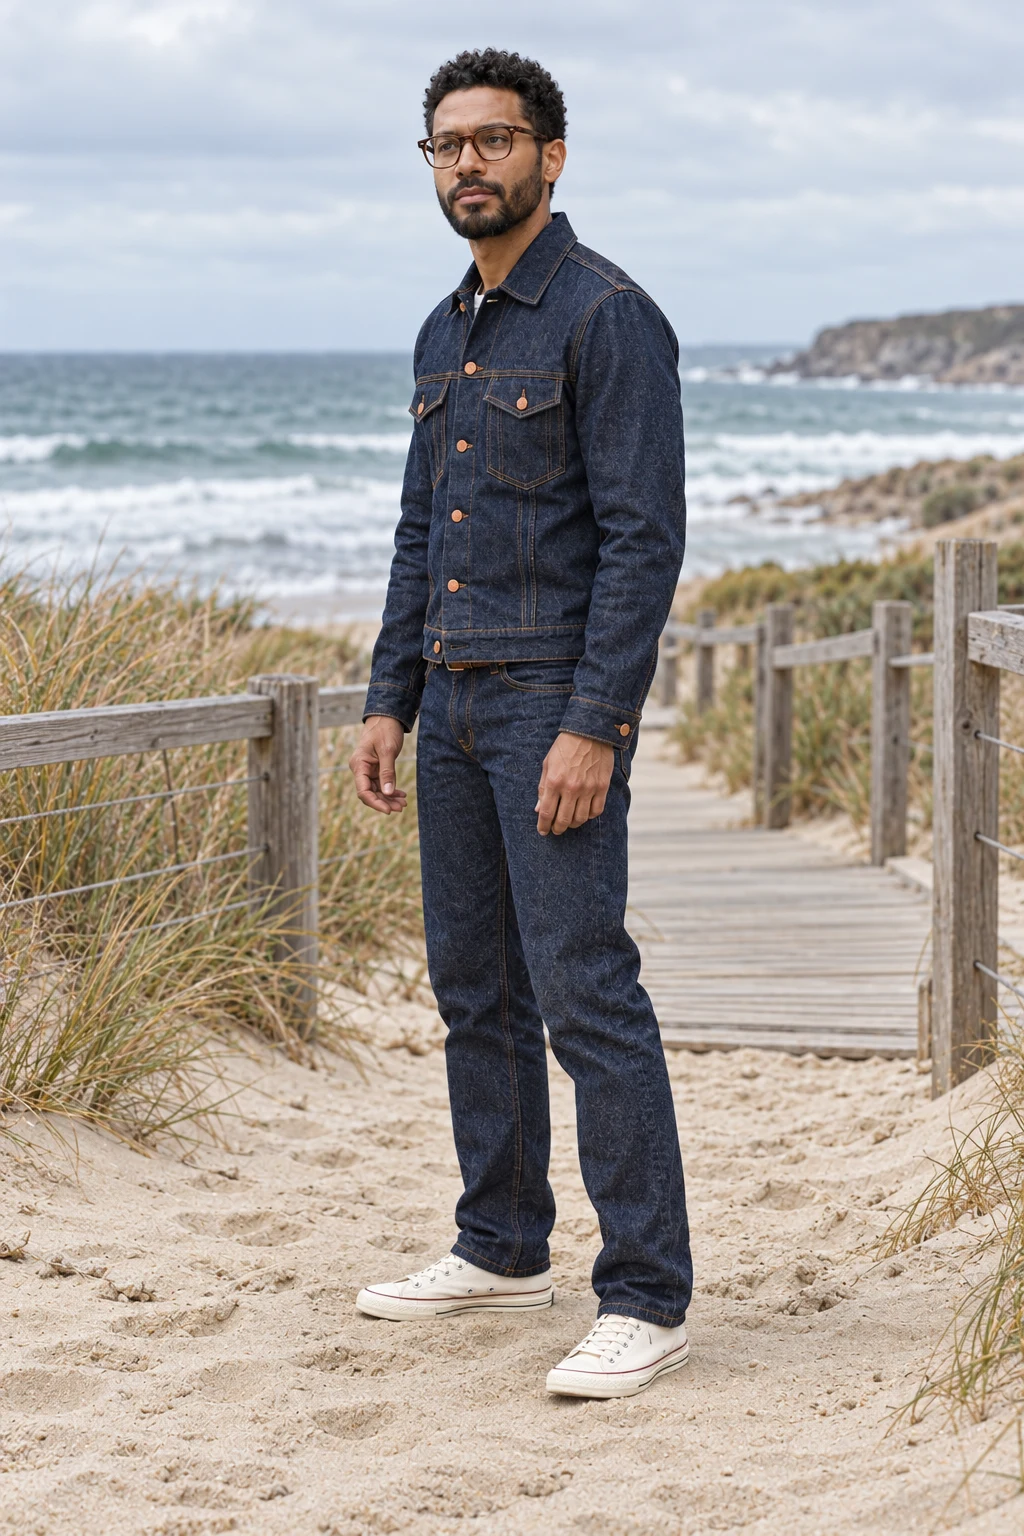
Checklist: 4/4 · Outfit pass
Exact prompt & input log: b-beach
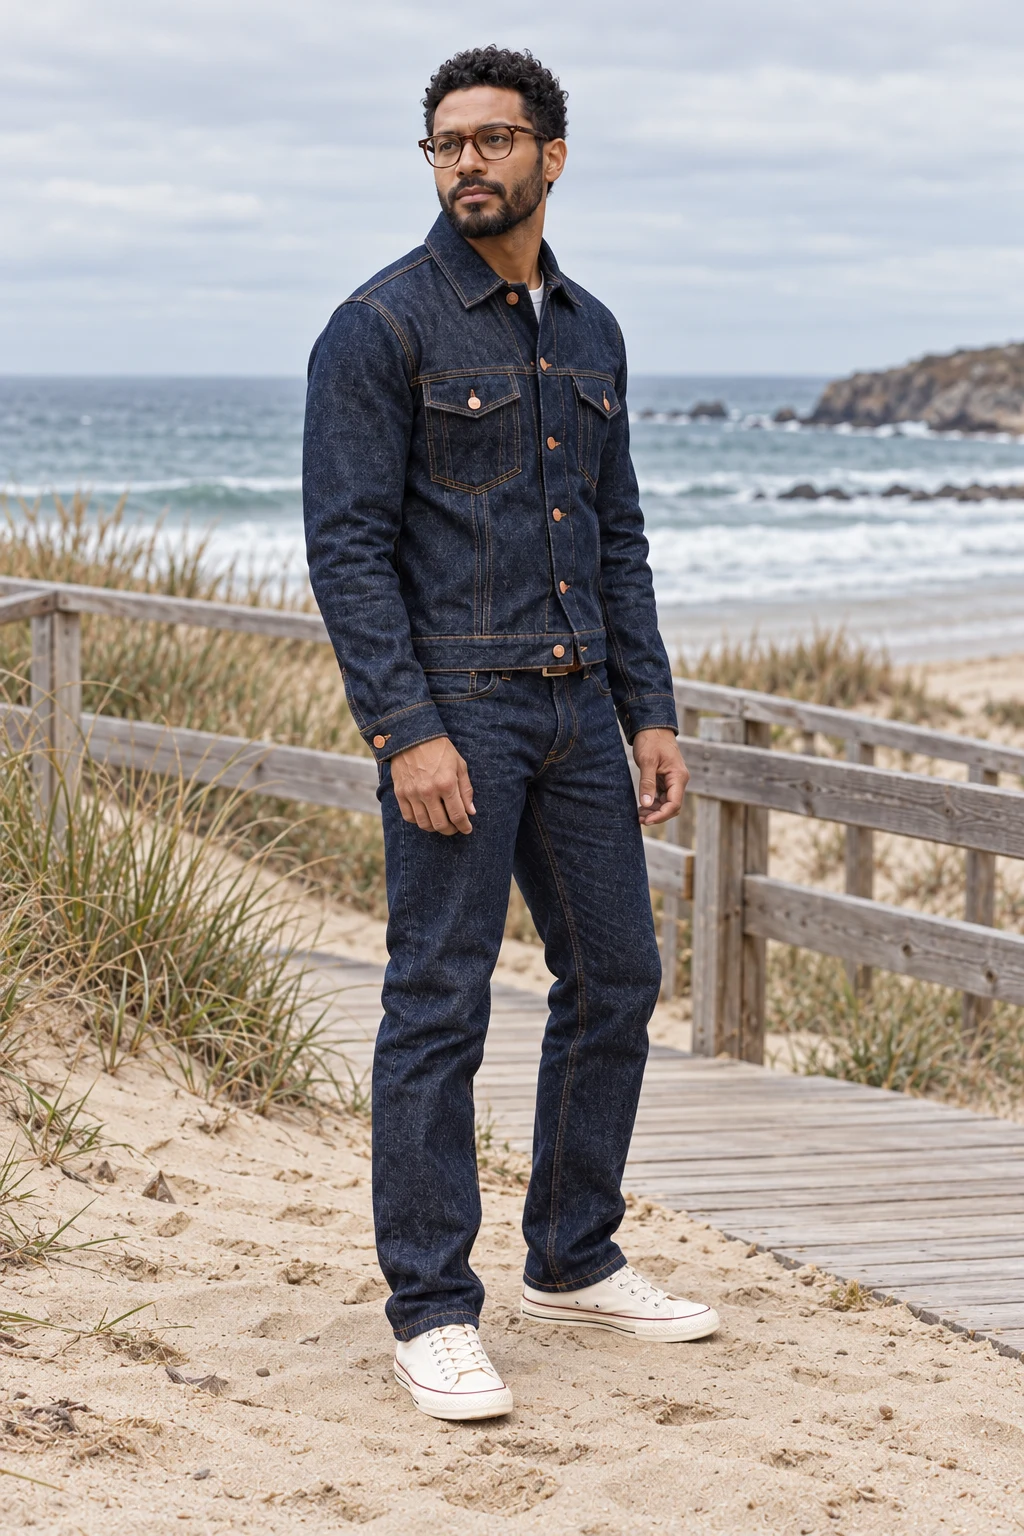
Checklist: 4/4 · Outfit pass
Exact prompt & input log: c-beach
Outfit Consistency by Reference Method
Which Clothing Details Drifted Most?
| Output | Indigo color | Cut, collar & pockets | Denim & golden stitching | Buttons & cuff hardware |
|---|---|---|---|---|
| a-beach | P | P | P | P |
| a-cafe | P | P | P | F |
| a-street | P | P | P | F |
| a-studio | P | P | P | P |
| b-beach | P | P | P | P |
| b-cafe | P | P | P | P |
| b-street | P | P | P | P |
| b-studio | P | P | P | P |
| c-beach | P | P | P | P |
| c-cafe | P | P | P | P |
| c-street | P | P | P | P |
| c-studio | P | P | P | P |
How Do You Keep One Outfit Across Multiple AI Photos?
Reuse a fixed identity-and-outfit brief in Create Photos, and change only the shot direction. These steps use the existing Studio workflow. The screenshot shows the current local interface; the editorial experiment above was generated separately.
1. Choose a saved AI influencer or an authorized character image
Open Create Photos and sign in when prompted. Use Choose AI Influencer for a saved character, or Upload reference image for an original adult identity photo. A clear full-body look is more useful for preserving clothing than an isolated headshot. Our consistent AI influencer guide covers the separate identity problem.
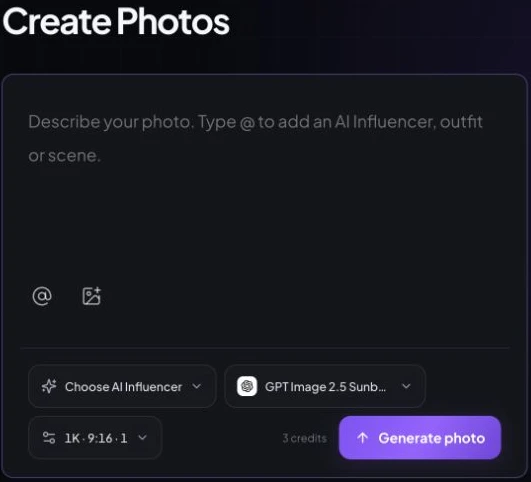
2. Attach the garment reference with a clear role
Use the upload control for your own clothing image. The @ asset selector also offers existing Outfit assets. Select the actual entry and confirm its reference chip appears. Merely pasting “@Outfit” or a filename does not attach an image. Keep the creator reference responsible for identity and the garment reference responsible for clothes.
Avoid contradictory jackets. Keep a full view for silhouette and a crop for details. Add a rear reference for rear views. Resolve the selected model’s reference-limit warnings before generating.
3. Lock the clothing description and output settings
Write a compact inventory: indigo denim, pointed collar, six copper front buttons, two flap pockets, buttoned cuffs, golden double seams and straight-leg jeans. Keep that inventory unchanged across the series. Choose the same model, resolution and aspect ratio. Record those choices instead of attributing a difference to references when you also changed models.
4. Change the scene and pose one frame at a time
Start with a front view, then a gentle three-quarter turn. Replace only the location/action sentence for café, street, studio or coast. Avoid huge jumps in perspective, extreme lighting and hands covering fastenings until the baseline works. A social series benefits from varied moments; the garment specification should remain stable.
5. Compare, repair and export the reviewed set
Open each image at full size next to the original. Count buttons, trace seams and compare cuffs and hems. If the whole look drifts, simplify the brief and improve the reference. If one visible detail is wrong, try Edit Photos with a narrow correction. Recheck the whole frame after editing; a local request can change unrelated details.
For first establishing an outfit, explore Virtual Try-On or AI Clothes Changer. Once the look is approved, preserve it rather than repeatedly requesting a new style. AI Fashion Model Generator covers fashion imagery; this guide focuses on the same garment across shots.
Which Outfit Consistency Prompts Can You Copy?
Separate invariants from the change request. Replace the example garment inventory with your real reference details, then attach the corresponding assets through the composer. The prompts below do not create or bind references by themselves.
1. Change the pose, preserve the outfit
Use the selected creator reference for identity and the attached clothing reference for the outfit. Keep the deep-indigo denim jacket, pointed collar, six copper front buttons, two buttoned flap pockets, long buttoned cuffs, golden double topstitching and matching straight-leg jeans. Change only the pose: standing with weight on one leg, arms relaxed, full outfit visible. Preserve the original face and clothing construction.
2. Move the same outfit to a café
Keep the referenced adult creator and the exact referenced denim outfit. Preserve the indigo color, denim weave, collar, pocket flaps, copper buttons, cuffs and seams. Change only the location to a corner café with green window frames. Rest one hand on a chair back; keep the other arm relaxed. Full-body photograph in soft daylight. Do not redesign or restyle the clothing.
3. Change the camera angle
Photograph the selected creator in the same referenced outfit from a front three-quarter angle. Keep the collar, pocket shapes, button count, sleeve length and trouser cut unchanged. Use an eye-level camera and soft neutral light. Show the front and visible side only; do not invent unseen back designs. Keep hands away from the jacket fastenings so the garment can be checked.
4. Build a social photo series
Create one photograph for a consistent social series using the selected adult creator and attached outfit reference. Preserve the exact clothing, shoes and glasses. Scene for this frame: walking slowly on a brick sidewalk, arms low, full body visible. Keep the same camera height, neutral daylight and portrait framing as the other series images. Produce one scene, not a collage. Reuse this brief and replace only the scene sentence.
5. Create a fashion campaign concept
Use the selected adult creator and the authorized garment reference. Keep every visible garment feature unchanged, including color family, material, collar, buttons, stitching and fit. Place the creator in a charcoal photography studio, one hand near the belt and the other relaxed. Show a clear full-length outfit view. This is an AI-generated campaign concept: do not add logos, endorsements, claims, brand marks or product performance results.
6. Repair one drifting detail
Edit the selected result using the original outfit reference. Restore one copper button on each visible sleeve cuff to match that reference. Preserve the existing person, hands, pose, background, framing, jacket color, six front buttons, pocket flaps and jeans. Change only the cuff hardware. Keep realistic denim folds. If the correct detail is not visible in the reference, request another view rather than inventing it.
Google’s official image prompting guide recommends specifying subject, composition, action, location and style, and illustrates character preservation and local edits. Those are useful prompt-writing principles, not a guarantee that a particular garment survives every transformation.
How Do You Fix Outfit Drift Without Rebuilding the Whole Image?
Diagnose the changed detail before choosing an edit. Correct one visible discrepancy, keep the original reference attached, then inspect everything the edit might have affected.
| Problem | Possible cause | What to try |
|---|---|---|
| Color shifts | Lighting, white balance or an ambiguous wash description. | Use neutral light; name the color family; compare multiple fabric areas. |
| Texture becomes smooth | Small reference or strong stylization may obscure the weave. | Add a clear fabric crop; request denim texture; avoid conflicting style directions. |
| Collar, pockets or sleeves change | Weak construction evidence or a contradictory styling request. | Use an unobstructed full garment reference and a fixed construction inventory. |
| Buttons, print or accessories drift | Fine details may be reinterpreted. Our A café/street frames lost cuff hardware. | Request the exact visible detail; inspect the edited area and the rest of the frame. |
| Back details are invented | The input never showed the back. | Add a rear photograph; otherwise avoid claiming an exact rear reconstruction. |
A real correction attempt: restore missing cuff buttons
The text-only street output omitted visible copper cuff buttons. We made one additional edit using that result and the original character/outfit reference. This repair is separate from the 12-frame comparison and never replaces its failed entry.
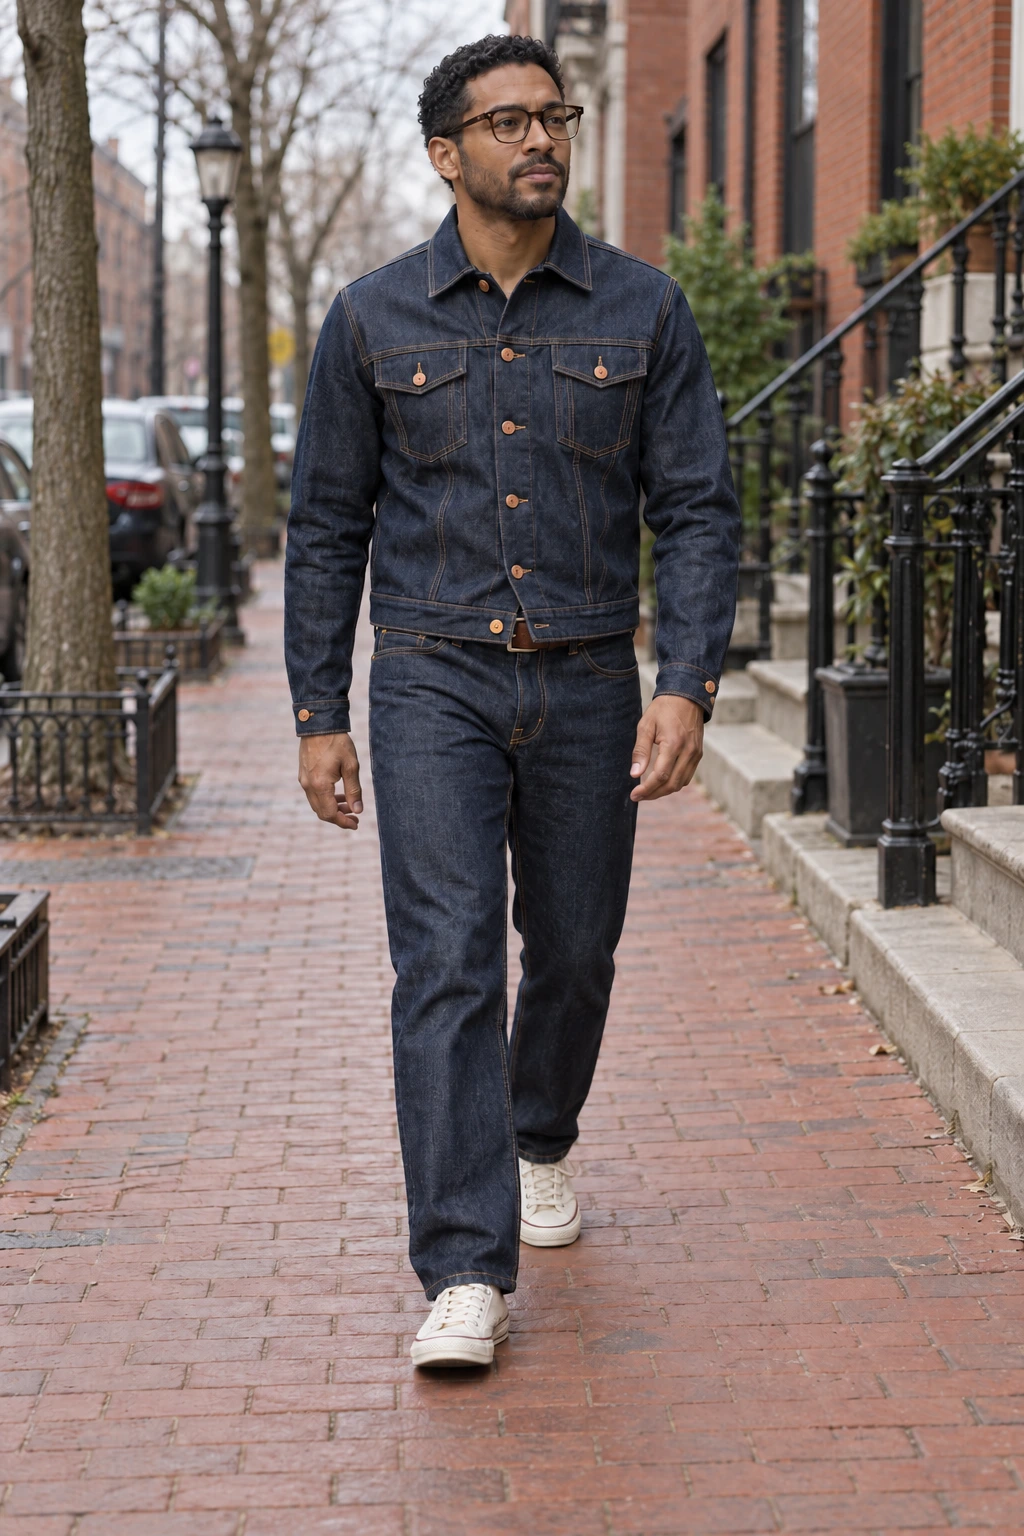
Both visible copper cuff buttons are present after the single edit, while the street composition and main clothing features remain recognizable. Fabric folds and small image details changed slightly; this is an improvement under the visible-hardware check, not a pixel-preserving retouch. The edit was excluded from the 12-image statistics.
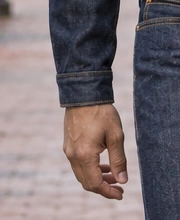
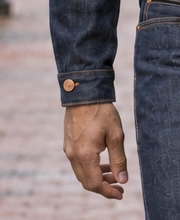
Use local editing when the pose, identity and garment are already close. Regenerate from the original inputs when several structural features are wrong. For a product listing, compare against actual garment photographs; a convincing invented seam is still an inaccurate seam. Do not represent a synthetic fashion concept as a verified customer wearing experience.
What Should You Check Before Publishing the Series?
Review the set as one wardrobe, not twelve attractive individual images. Keep the source reference beside the final selection and inspect both full-frame composition and small details.
- Same color family, material and recognizable wash, allowing plausible light.
- Same collar, pocket shape, silhouette, sleeve length and trouser cut.
- Correct visible buttons, print placement, seams, shoes and accessories.
- No invented unseen back details presented as exact reconstruction.
- Stable adult identity, believable hands, natural folds and ground contact.
- Accurate image disclosures, garment permissions and commercial claims.
Save the reference, prompt, model/settings and unsuccessful outputs. A consistent outfit AI generator workflow needs reference-and-review discipline, even when the first result looks convincing.
Frequently Asked Questions
Do I need a reference image to keep the same clothes?
A detailed text prompt can maintain a general look, but it cannot uniquely specify an actual garment. Use a clear clothing reference when exact construction matters. Our text-only examples preserved the overall denim look but lost visible cuff hardware in two frames.
Can I change the background without changing the outfit?
Yes, request a background change while explicitly preserving the garment and creator references. Begin with a modest pose change and neutral lighting. Review the result: an instruction to preserve clothing is not a guarantee that every detail will survive.
How do I keep clothing colors consistent?
Use the same well-lit reference and repeat a specific color description. Keep white balance and lighting reasonably similar. Compare several visible fabric areas, not a single highlight. For exact commercial color reproduction, validate against the real garment and use a controlled photography or retouching workflow.
How do I preserve the person and outfit together?
Give the inputs separate roles: creator reference for face and build; clothing reference for garment construction. Select or upload actual assets in the composer. A copied @ name is plain text until the matching asset has been selected and appears as a reference chip.
Does adding a second image always improve consistency?
No. It can clarify clothing details, but conflicting, low-resolution or mismatched references can introduce ambiguity. Our character-only and character-plus-crop groups tied under a coarse visual checklist; four frames per method cannot establish that the methods are equivalent.
Can AI reproduce the back of clothing from a front photo?
It can invent a plausible back, but that is not verified reconstruction. Supply an authorized rear or side photograph for back pockets, yokes, prints or closures. Otherwise keep those details out of frame or label the view as an illustrative interpretation.
Which AI model should I use?
Choose an image model that accepts your required references, then run a small trial with your own garment. Reference limits, editing behavior and output options vary. The research models, our editorial image tool and the models selectable in Studio are separate systems; none of these results proves universal production performance.
Is a passing image ready for a product listing?
Not automatically. Our checklist tests visible outfit features, not exact sizing, brand accuracy, colorimetry or legal suitability. Check the real garment, permissions and platform requirements. Disclose synthetic imagery where required and do not present an AI character as a customer who wore or tested the product.
Choose your character, attach an outfit reference and build a reviewed photo series. Explore the AI Influencer Image Generator for the broader image workflow.
Sources and Experiment Files
- Park, H., Choi, B. & Choi, Y. A VLM-based framework for evaluating garment consistency in AI-generated images based on DeLong’s theory. Fashion and Textiles 13, 26; published June 11, 2026. Dataset, human-evaluation method and Figures 3–4 checked October 18, 2026.
- Google: Tips for getting the best image generation and editing in the Gemini app, August 26, 2025; checked October 18, 2026.
- Original 12-frame experiment log: exact prompts, available settings, limitations, individual scores and separate correction attempt. Full-size WebP outputs are linked from each image; raw PNG masters are retained in the project’s editorial archive.
Plan Content
Measure Engagement
Build Your Profile
Price Your Work
Write Post Copy
Brand Partnerships